Android Data Recovery
How to Get Rid of iTunes Error 9006
-- Wednesday, January 10, 2018
People also read:
Typically, iTunes error 9006 would be triggered by the failure when iTunes is not able to communicate to the update servers and thus cause an unsuccessfully download. In this article, you will learn how to fix iTunes error 9006 effectively.
Guide to get rid of iTunes Error 9006
To fix iPhone error 9006, you should focus on firewalls, anti-virus apps, network problem, iTunes version and OS version, etc. Now, check the below troubleshooting tips to orientate the iTunes issue.Solution 1 Check Your Network Connection
Please make sure that you have an active network connection and are well connected to the internet.
Solution 2 Update iTunes Version
Please firstly quit out of iTunes and uninstall the App. Now download and update iTunes on Windows PC or Mac computer.
Solution 3 Disable Firewalls and Anti-virus Apps
Please check your firewalls and anti-virus Apps on your computer. If they are turned on, please try to temporarily disable those apps when you update or restore iPhone with iTunes.
Solution 4 Reboot Devices
Please reboot your Mac or Windows PC as well as iPhone/iPad. Then try to use another USB cable or switch to a different USB port on the computer to try again.
Solution 5 Choose Other Tool to Update/Restore iPhone
If you can still see the iTunes error 9006 even you have tried all the solutions above, you are recommended to use the other tool to update or restore iPhone and thus you can completely get rid of the iTunes error. iOS System Recovery program seems to be a good choice for you. Now, check it out below to see how it works.
Step 1. Download iOS System Recovery
First of all, please download and install iOS System Recovery program on your computer and launch it. Then go to "More tools > iOS System Recovery" and plug your iOS device into computer via a USB cable.


Step 2. Choose Update or Restore Option
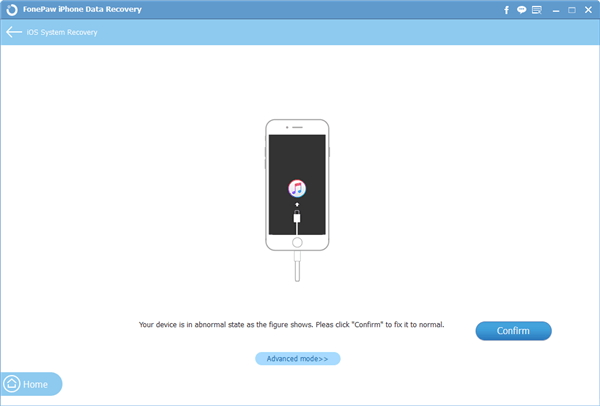
Now, you will see the interface as below. If you attempt to update you iPhone/iPad, please click on the "Confirm" button to continue. And if you need to restore iPhone/iPad, please choose the "Advanced mode". The program will do the same job with iTunes when you update or restore iOS device.

Step 3. Confirm Device's Info
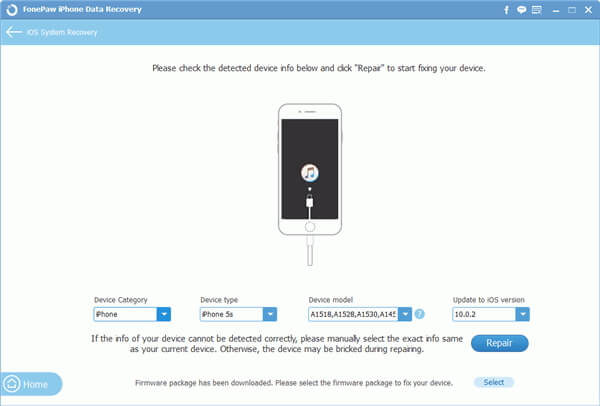
Please check the information of your device is correct or not. Choose the corresponding one if it is not correct.

Step 4. Update or Restore Device
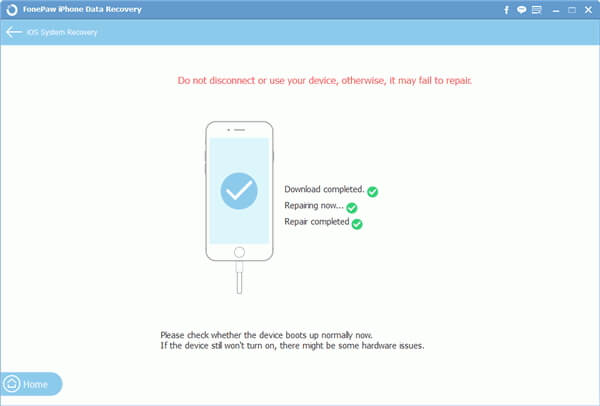
Click on the "Repair" button and you should do nothing but wait for the process. After the job is done, you can get your iPhone or iPad updated or restored.

That's it! I am sure that you can well solve the iTunes error 9006 after reading this guide. Please share with your friends if you think it is useful. And if your get any questions, just write it down on the comment area below.


