Android Data Recovery
How to Fix iPhone Is Disabled Connect to iTunes Issue
-- Monday, July 31, 2017

Normally, kids, your friends or family member would be the most common reasons for this error. In this way, please keep your iPhone away from your kids as they like tapping buttons. And your friends or family member may have no ideas your iPhone would be locked after several attempts to enter the passcode. So, please remind them of this issue.
The article would introduce two methods to solve "iPhone is disabled connect to iTunes" error. Please check it out below.
- Part 1. Restore iPhone with iTunes to Fix "iPhone is disabled" Problem
- Part 2. Troubleshoot Crashed Android Phone and Fix It
Part 1: Restore iPhone with iTunes to Fix "iPhone is disabled" Problem
To fix "iPhone is disabled" error via iTunes, you should note that all of the data and documents on iPhone would be erased and then it would restore the latest iOS. So you need to sync your iPhone and make a backup before you start to restore it.Step 1 Launch the latest version of iTunes and connect your device to computer you have previously synced with. Otherwise, please try to enter the iPhone recovery mode
Step 2 Sync your iPhone via iTunes to make a backup.
Step 3 After the sync completes, please click your iPhone icon on the interface of iTunes, then go to "Summary" at the left pane and click "Restore iPhone".

Step 4 Tap "Restore from iTunes backup" when you can reach the Set Up Screen on the restoring process. Now you can restore the backup to your iPhone.
Part 2: Solve "iPhone is disabled" Problem with iOS System Recovery
As it is not easy as you think to fix the "iPhone is disabled" problem via iTunes and it may take you a long time to deal with it, you are recommended to use iOS System Recovery program to solve the issue. iOS System Recovery can bring your device back to normal easily. Please check how it works below.First of all, please download and install the iOS System Recovery on your computer by clicking the following button. Then please launch it.


Step 1 Connect iPhone to PC
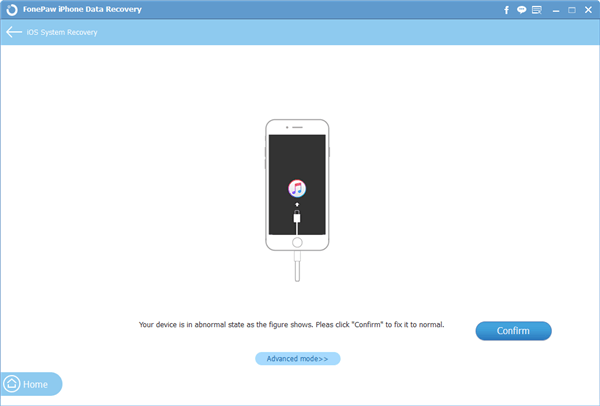
Launch the program and move to "iOS System Recovery" interface. Then connect your disabled iPhone to computer via the USB cable.

Step 2 Start to Fix Your iPhone
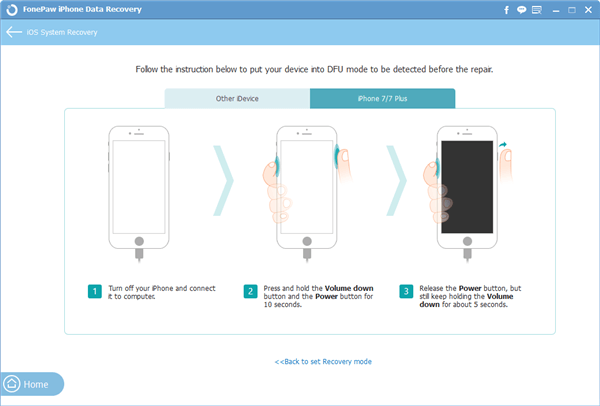
Choose "Advanced mode" to start the process and then you would be asked to put your iPhone into DFU mode. Please simply follow the guide from the program for the job.

Step 3 Confirm Your Device's Info
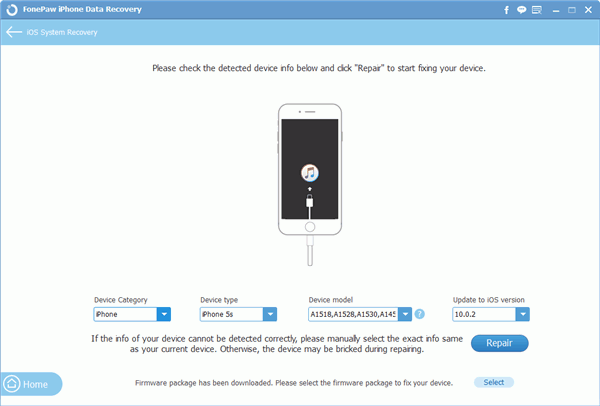
Now, you can see that your iPhone’s info would be shown on the interface. Please confirm it. If it shows any wrong info, please choose it manually.

Step 4 Fix Disabled iPhone to Normal Status
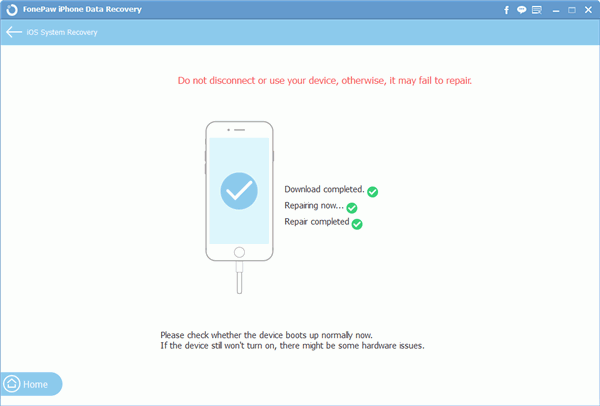
Click on the "Repair" button after you confirm your device's info and then wait for the process. After that, your iPhone can be used normally.

That's it! Can the above guides help with your case? Please share what you think on the following comment box.


