Android Data Recovery
How to Wipe Your Android Phone
-- Monday, December 30, 2013
Wipe means remove or eliminate something completely. For flash lover, it means to wipe cell phone data. The most exactly meaning of wipe in IT industry is: Wipe means to make your cell phone back to the factory settings and all the data including contacts, messages, apps are all deleted.
Note: App2sd and root permission should change after wipe, also, important partition steps of app2sd should also be operate again. Double wipe means to rub the cache and internal storage data.
Today, I will show you two different ways to wipe your Android phone.
- Part 1. Enter recovery mode of your Android system
- Part 2. Wipe data of your Android with Phone Transfer
- Part 3. Delete Android Phone Data via Secure Eraser
Part 1: Enter recovery mode of your Android system
1. Firstly, enter recovery of your phone or the third-party one. Recovery is similar to a safe mode of WinPe in the computer that you can open the recovery mode of the system even if there’s a problem in the system.
The way to enter recovery mode for HTC One: Power off your HTC One and press the “Volume -” and the “Power” button simultaneously to enter bootloader. Select recovery with volume buttons and press the “power” button to enter Recovery.
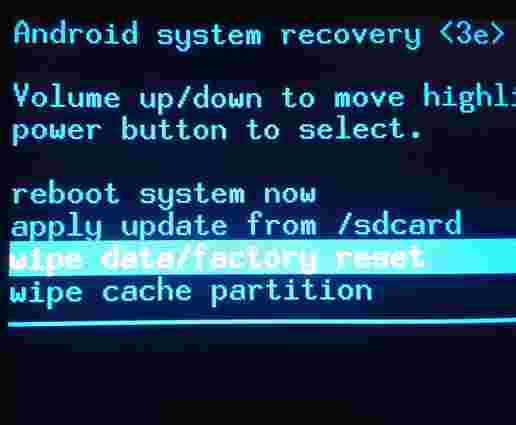
2. After entering the recovery menu, you will see two options: “wipe data factory reset” and “wipe cache”. Choose either of these two options with the volume button and perform it, and wait for a few seconds, when it done, you have wiped your phone. If you need to double wipe your phone, you should perform both of these options. These two options can be easily found and some high-performance phone also has 4-wipe or 6-wipe recovery option. You can choose to wipe the program cache, for example.
3. You can wipe you phone for these situations:
Before flash your Android phone, choose “Wipe cache” and “wipe data”.
When set your phone back to factory settings, choose “Wipe cache” and “wipe data”.
When you need to wipe the cache, choose “Wipe cache”.
Part 2: Wipe data of your Android with Phone Transfer
The latest version of Phone Transfer allows you to erase your Android data easily, what you need to do is to download Phone Transfer on your computer and read the tutorial below.

Step 1 Download and Install Phone Transfer on Your PC
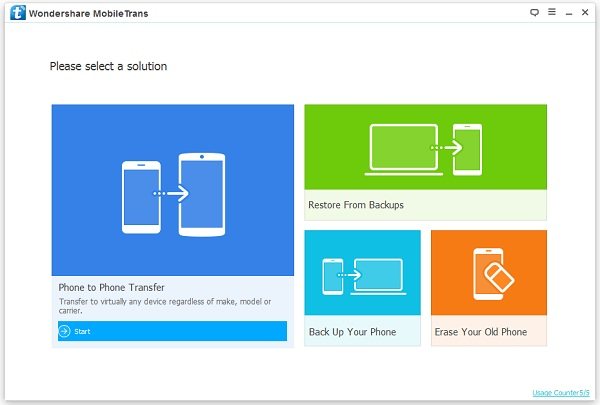
Launch Phone Transfer after downloading and installing Phone Transfer on your computer, you will see the four modes showing as below. Choose “Erase Your Old Phone” mode, which protect your personal data with our professional data destroyer.
Step 2 Connect Your Android Device to the Computer
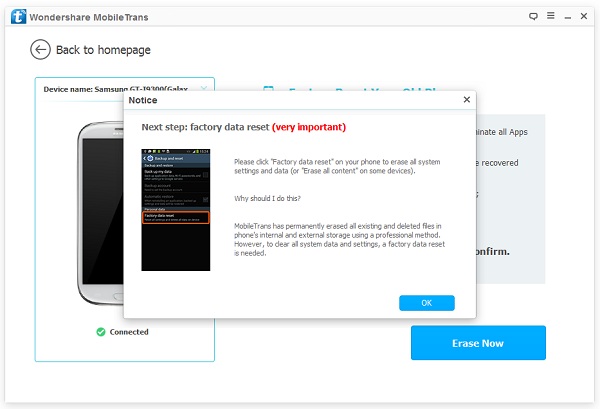
After choosing the mode, connect your Android to the computer with the USB cable.
Note: Make sure that the USB cable is well connected to the computer through the USB cable, otherwise the process will fail on the half way.
With Phone Transfer, you can easily wipe your Android data that you want. Though you can also wipe your Android data with the Android system recovering mode, it is easier and more convenient to use Phone Transfer to wipe Android data.
Part 3: Delete Android Phone Data via Secure Eraser
Secure Eraser is a reliable application that allows you to wipe your Android phone completely. It can detect all types of data including photos, music, videos, contacts, messages and more and let you erase them in one click. Before you do so, you’d better back up the Android data to PC because there’s impossible to recover the files once they’ve been deleted.


Step 1 Launch Secure Eraser on Computer
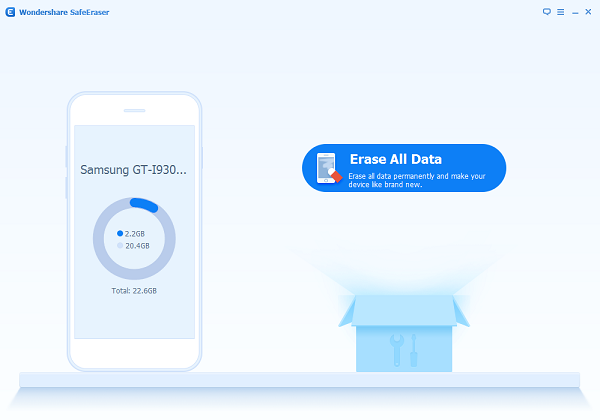
First of all, install and run the program on computer, and then connect your Android device to PC via the USB cable. Turn on the USB debugging feature on your Android device.You will see the below interface when the program recognizes your device. Tap on "Erase All Data" to move on.
Note: This program works with all brands of Android device such as Samsung Galaxy S7 Edge+, S7 Edge, S7, HTC One M10/M9, Google Nexus 6/5, Sony Xperia Z6, LG G5/4/3, etc.
Step 2 Ready to Erase All Data from Android
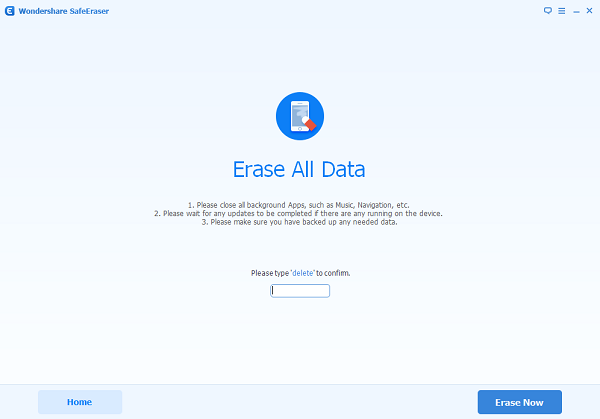
Follow the instruction given in the interface and enter "deleted" in the box. After that, click on "Erase Now" to start the process. Only a few minutes, all data will be erased thoroughly.
Step 3 Factory Data Reset on Android
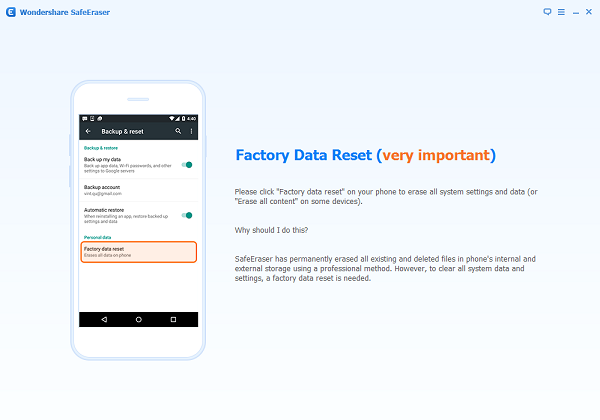
To complete the process, you still need to perform a factory data reset on your device. Follow the instruction and clear all system data and settings from your Android phone.
Choose the method you like most and have a try! If there’s any problem during the process, feel free to let us know in the comments below.


