Android Data Recovery
Ways to Wipe Phone Data and Cache Thoroughly
-- Wednesday, January 29, 2014
- Part 1. Wipe Phone Data and Cache with Your Android
- Part 2. Erase Phone Data and Cache with Phone Transfer
- Part 3. Clear Android Data and Settings via Secure Eraser
Part 1: Wipe Phone Data and Cache with Your Android
To begin with, you will be asked to enter the recovery mode and perform the instructions below after flashing your phone into CWM4.0.Note: While wiping your data, it is quite possible for your phone settings, apps or other files to be deleted and your phone is set back to default factory settings. So, remember to do backup before wiping your data. As long as you have done backup with your Android phone, you can easily get these data back if you want.
Now, let's experience the amazing tutorial on how to wipe data and cache of your phone together:
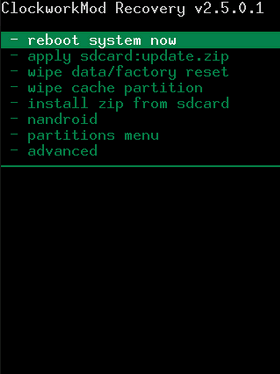
1. Power off your phone, and press the "Power on" button and the "Home" button simultaneously to enter CWM4 the recovery mode.
2. Hit on "Volume -" button to choose the option – "Wipe data/factory reset" and perform by clicking the "Home" button.

3. Click "Volume -" button and to choose "Yes -- delete all user data" and press "Home" to confirm.
4. If you see the words in white color as the following window shows, it means that you've wipe your phone data successfully.
5. Choose "Wipe cache partition" with "Volume -" and click "Home" to perform it.
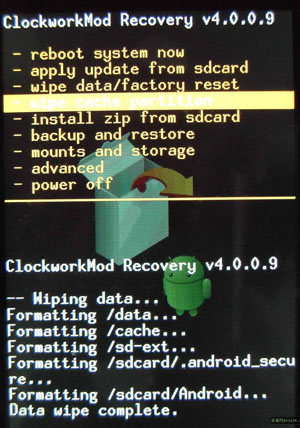
6. Then, choose "Yes -- wipe cache" and hit "Home" button to get ready to wipe the cache.
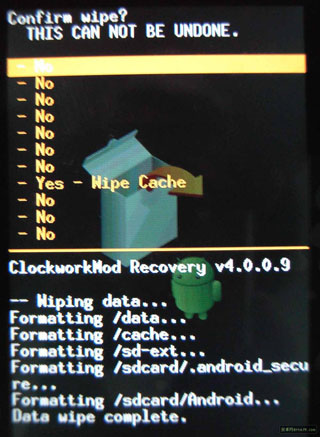
7. As you see the following window, it means you are in the progress of wiping cache
Part 2: Erase Phone Data and Cache with Phone Transfer
Phone Transfer is an outstanding data transferring tool for phone users. You are also allowed to wipe phone data and cache with it.Step 1 Install and launch Phone Transfer on Computer
First of all, download and install Phone Transfer on your computer with the buttons below.


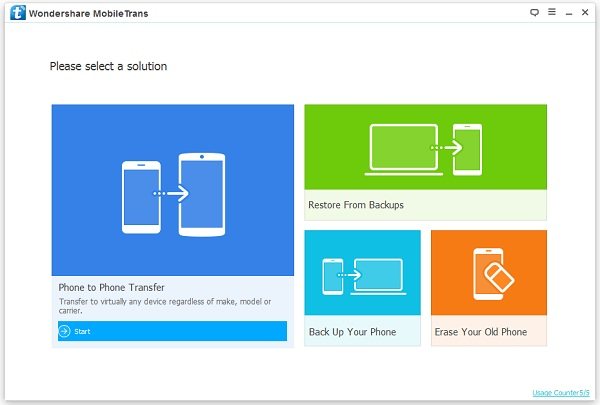
Then, launch it. You will see a window as below:
Step 2 Choose “Erase Your Old Phone”
After launching Phone Transfer, you will see four modes listed: “Phone to Phone Transfer” “Restore from Backups” “Back up Your Phone” “Erase Your Old Phone”. To try “Erase Your Old Phone”, you can protect your personal data with the professional data destroyer.
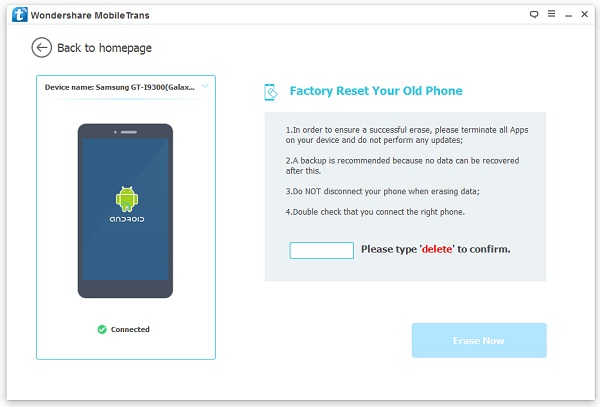
Step 3 Connect Your Phone to the Computer
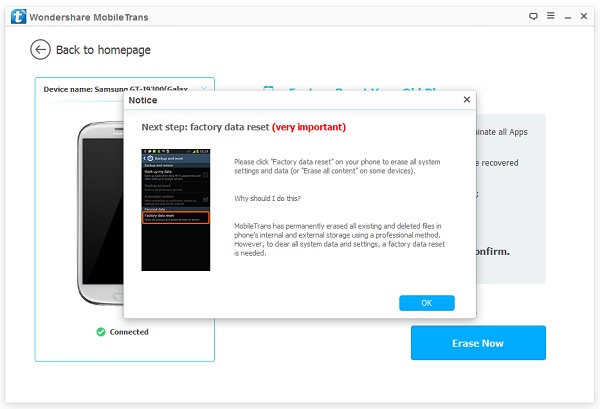
After connecting your smart phone to the computer, the program will detect your phone and erase all existed data on the phone and deeply search and erase deleted data that still stays in your phone’s memory. After that, you can sell, recycle or donate your phone without worrying data leaking.
Part 3: Delete Android Phone Data via Secure Eraser
Secure Eraser is capable of wiping contacts, messages, videos, photos, notes, search history, caches and cookies, etc. from Android device. Besides, it also clears the history of the deleted data from your device so as to make sure they are irretrievable. You can create a backup of Android data first if necessary. All Android phones are supported such as Galaxy S7/S6/S4, LG G5/4/3, HTC One M10/9/8, Moto X Pro/X, One Plus and more.


Step 1 Run Secure Eraser on Computer
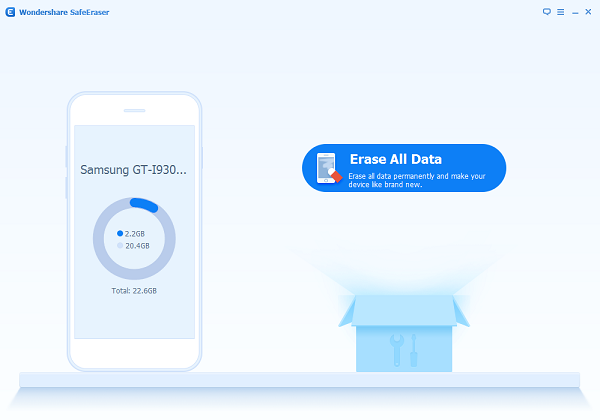
Download, install, and run the software on PC. Next, plug Android device into computer via the USB cable and enable the USB debugging on your device. When the program detects your phone, you’ll see the interface below. Select "Erase All Data" to continue.
Step 2 Choose Erase All Data
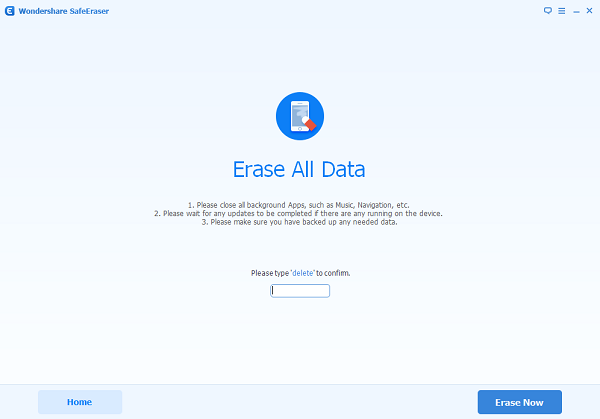
Read the instruction from the interface and then enter "delete" in the box. Click on "Erase Now", and the program will start erasing the data.
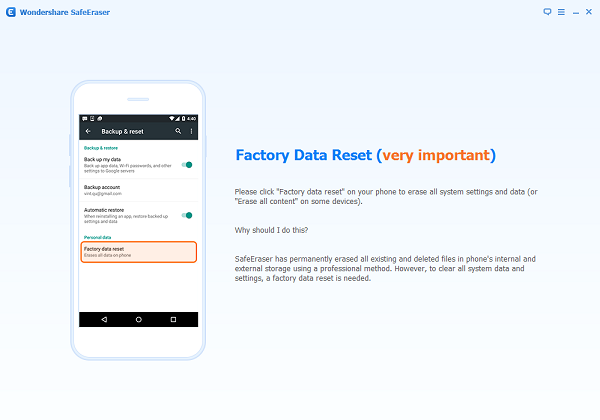
Step 3 Click "Factory Data Reset" on your Android
Finally, when the erasing is finished, you will be asked to erase all system settings and data from Android by taking a factory data reset on the phone directly.
That’s it. After wiping data and wiping cache partition, you can move on to do whatever you want. To repeat once again, you'd better backup Android data like contacts, SMS, and other previous data before performing wiping data. If, unfortunately, you lose your phone data while wiping, you can use Android Data Recovery or iPhone Data Recovery (if you use iOS device) to restore these important data back and store them on your computer with easy steps.


