Android Data Recovery
Regular & Smart Ways to Clear History on iPhone Safari
-- Thursday, February 18, 2016
Secure Eraser is a perfect tool to protect your private information from leaking to others. It can get access to all private information such as Safari history, contacts, messages, etc. stored on your device. Any data deleted on your iPhone can also be scanned out and erased with this program. So, it’s perfect for those who would like to keep all unwanted iPhone data gone for good. Here, we’ll show you two ways to clear iPhone safari history. You’d better read through all the methods here for the sake of data security.
- Part 1. Completely Erase Safari History with Secure Eraser
- Part 2. Clear Safari History through iPhone Settings


Part 1: Completely Erase Safari History with Secure Eraser
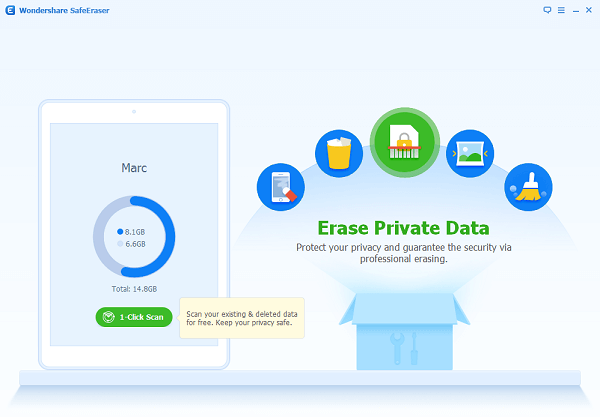
Step 1 Start Secure Eraser on ComputerBefore you get started, please download and install the software on computer. After that, start the program and connect your device to PC via the USB cable. You will see a message pop up from your iPhone, tap "Trust this computer". When the program recognizes your device, you will see an interface as below.

Step 2 Tap on "Erase Private Data" from the Main Interface
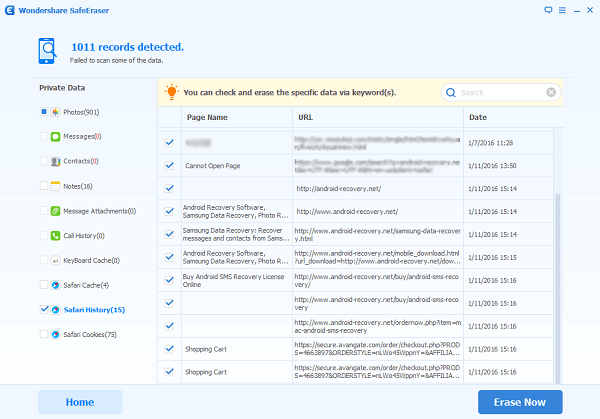
Choose "Erase Private Data" and the program will start scanning all your private data stored on iPhone. Once it finished, select "Safari History" to preview and select the search history that you would like to erase. You can also erase Safari cache and Safari cookies with this program. After that, click on "Erase Now". And you will be asked to enter "delete" in the pop-up window to confirm the decision. Then, click on "Erase Now" again to start erasing the history from iPhone.

Step 3 Removing Safari History from iPhone
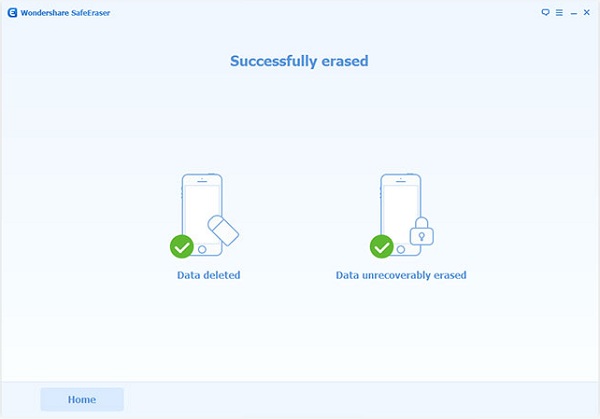
All Safari history from iPhone will be erased within minutes. When you see the interface as follows, it means you’ve successfully deleted iPhone Safari history.

Part 2: Clear Safari History through iPhone Settings
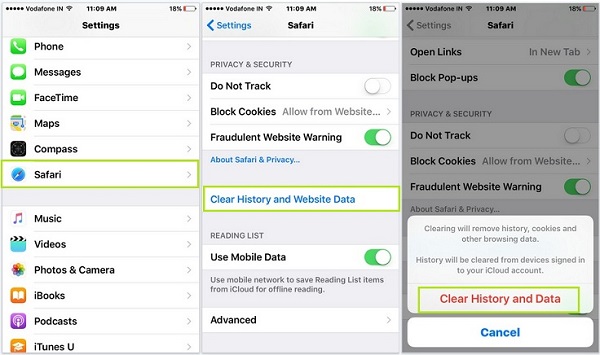
Step 1: Launch Settings in Home screen and scroll down to Safari.Step 2: Select Clear History and Website Data from the Safari interface.
Step 3: You will see a small window pop up from the bottom saying your action will remove history, cookies, and other browsing data.
Step 4: Click on Clear History and Data from the pop-up window to confirm the action.

Now you see how quick and easy it is to use Secure Eraser to erase your Safari history on iPhone. But you can also prevent Safari from storing your future search history by turning on the private browsing feature. By doing so, your iPhone will not keep track of your Safari searches, visited pages or the passwords you enter. Have a try now!


