Android Data Recovery
Transfer Photos between iPhone 8X and Windows 10/8/7 without iTunes
-- Wednesday, January 17, 2018
As you know, if you need to transfer pictures from iPhone 8 to Windows 10 is not that easy as you can just drag and drop. If you tired up with transfer data between iPhone and PC with iTunes, here we recommend you to try TunesGo, which can help you selectively and easy sync iPhone 8 photos to Windows 10 computer in one-click.
People also read:


Guide to Transfer Photos from iPhone 8/X to Windows 10 without iTunes
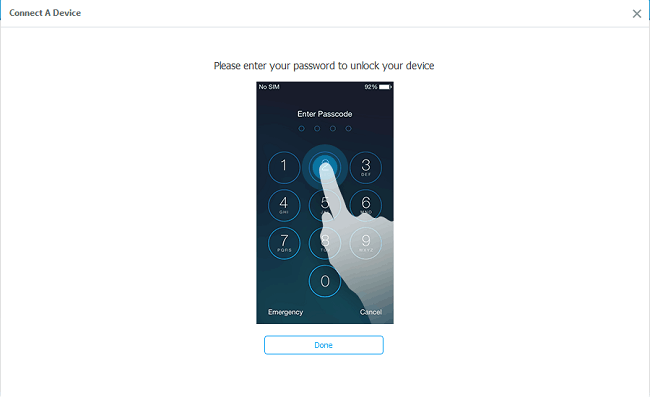
Step 1 Run TunesGo on Windows 10/8/7Download and install TunesGo on PC. Then, connect iPhone 8 to Windows PC via USB cable. Before connecting, enter the password to unlock your device, or you will see the interface as below. If it’s the first time you connect iPhone 8/X to PC, remember to tap “Trust” on the phone screen to authorize the computer to access to your iPhone.

Step 2 Transfer/Backup Photos to PC
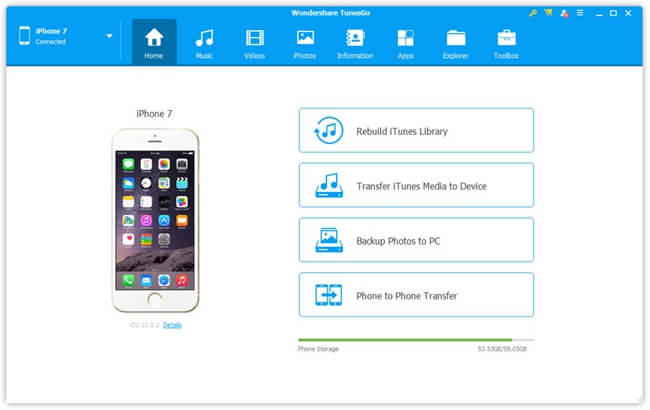
When iPhone 8/X is well recognized and connected, you will see the main interface as below. Click the “Backup Photos to PC” button in the right menu column. This function enables you to transfer all photos to Windows 10/8/7 at a time and you cannot preview the pictures before transfer.

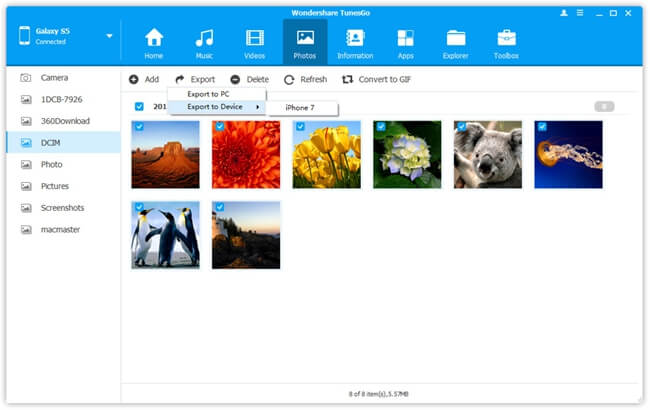
If you want to check the photos in detail and do selectively photo transfer, you can click into Photos in the top-middle data bar. All photos stored in your iPhone 8/X will be displayed in the main window. Just tick those you want and hit the Export button. Then, select "Export to PC" transfer photos from iPhone X/8 Plus to Windows PC.

Now, you can view the iPhone 8/X photos on PC. And you can share them to your friend via Facebook, Instagram, Pinterest and other social media on PC.


