Android Data Recovery
How to Transfer Photos from Computer to Nexus
-- Thursday, February 20, 2014
Android Transfer is designed for people to manage their resource between computer and Android. With this app, users can freely transfer their photos from computer to Nexus with simple clicks. What's more, the user-friendly interface makes it possible to be easily used by both professionals or home users.
Get the trial version of Android Transfer below.


Now follow the detailed steps to import your photos to Nexus.
User Guide of Moving Pictures from Computer to Nexus
Step 1 Launch the AppAfter downloading the software, please install and launch it on your computer.

Step 2 Connect your Nexus and Computer
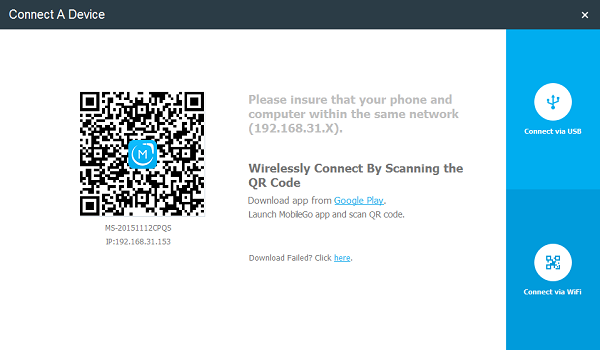
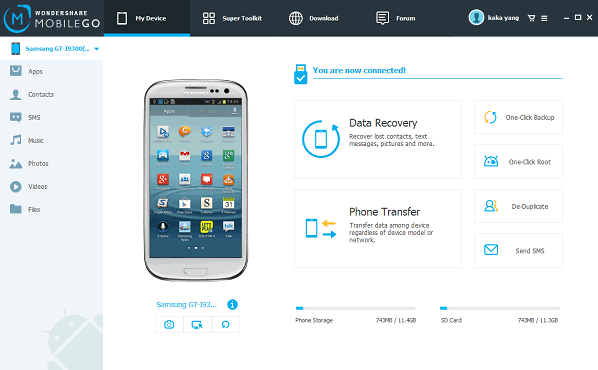
Use a USB cable to connect the devices or simply scan the QR code on screen. Then you will see your phone captured and shown as a thumbnail.

Step 3 Copy Photos to Nexus from Computer
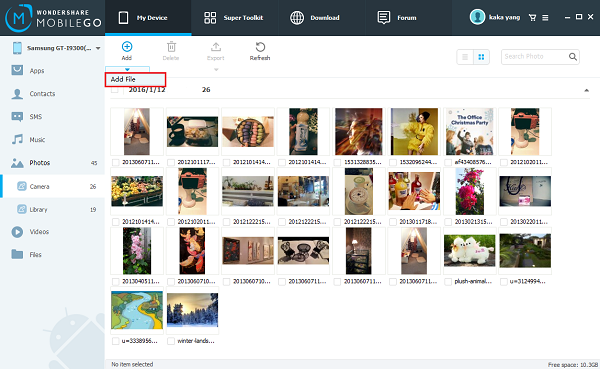
Click "Photos" on the left. You can choose one of the listed folders to locate your imported images and pictures. Otherwise, create a new folder by right clicking your mouse within photos.
Tick "Add" button as the picture we show you. Browse your file on the computer, then select pictures to import to the Nexus phone.

Note: Do not disconnect your phone and PC during the whole progress.
With only 3 steps, you can easily import pictures from computer to Nexus with Android Transfer. Besides transferring photos between Nexus and computer, it can also help backup files on computer, restore Android data with one click, easily manage apps, etc.


