Android Data Recovery
[Tech]3 Ways to Record Android Phone Screen
We sometimes may need to record our Android screen for different reasons but can not find the good screen recorder program that fits you most. In this article, I would introduce several acclaimed programs for your choice. Please continue to read.
- Method 1: Record Android Screen with Apowersoft Android Recorder
- Method 2: Record Android Screen with Android Recorder
- Method 3: Record Android Screen with Vysor
Method 1: Record Android Screen with the Apowersoft Android Recorder
Apowersoft Android Recorder can help you capture apps, game clips as well as video calls and other different screen actions on Android phones. Now let's introduce the simple steps for you.Preparation Before We Start:
Android 5.0 or later versions (recommend using 5GHz WiFi)
Computer with Internet connection (Windows or Mac)
Apowersoft Android Recorder


Step 1 Connect your Device to PC
Download and install Apowersoft Android
Recorder on your PC(Here we take Win PC as example). And then, you can connect your device to
computer via USB cable. When it is connected, you can get a same interface displayed on your Android device in
your computer immediately.
Note: Remember to set your device and computer under the same Wi-Fi network before casting.
Step 2 Begin Recording
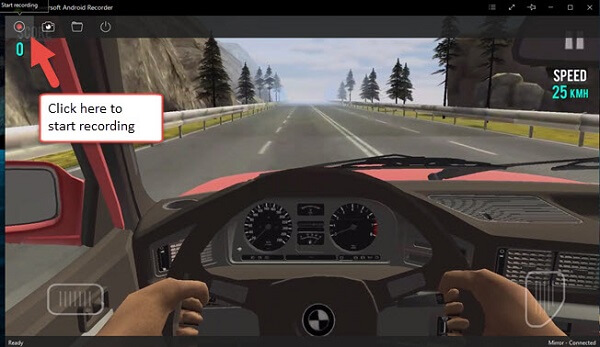
Let's take gameplay recording as an example now. Open your game on your Android and you can get an interface as
below. Then you can hit the red record button on the top left of the projected screen to start
recording. When the recording is finished, you just need to hit the stop button and the recording can be
saved to the output directory you set.
Method 2: Record Android Screen with Android Recorder
Android Recorder is a very effective third-party software that can solve most of the Android issues. To start the process of recording, please download and install the program on your computer by clicking the download button below.


Step 1 Run Android Recorder on PC
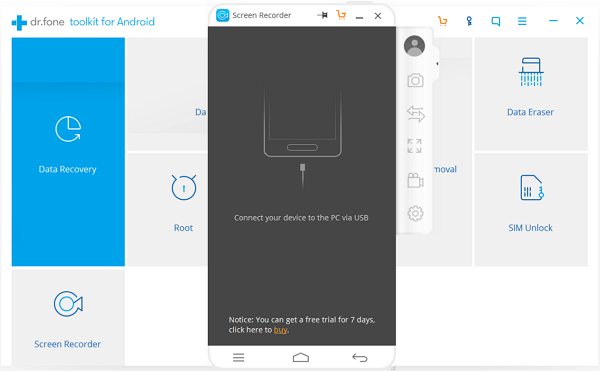
Once download and install the program, please run it on your computer. On the interface, please choose "Screen Recorder" pane from several different functions of the program.
Step 2 Connect Android Device to Computer
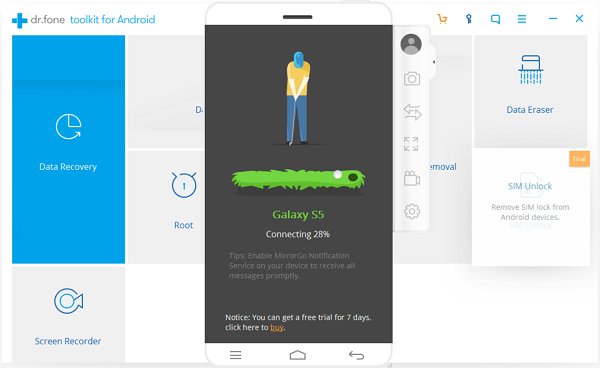
You can connect device to PC via the USB cable that comes together. As you need to get your device detected by the program, you should go to your device and follow the guide that is shown on the interface of the program to enable the USB debugging on the device.
Step 3 Display Android Screen to PC
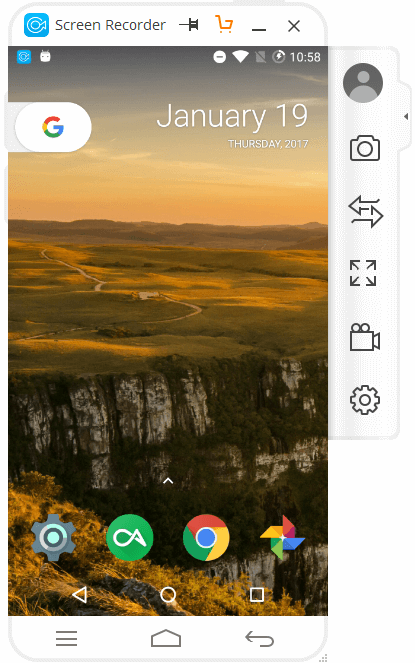
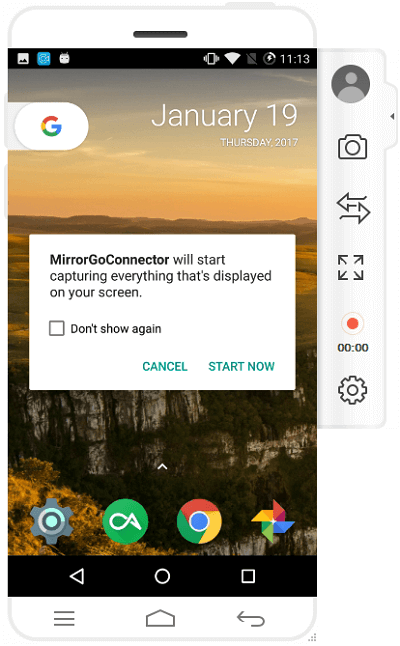
Now you are able to see what exactly your Android screen displayed on your computer. Then please click on the Android Recorder button on the right navigation bar and tap "START NOW" button to confirm the recording.
Step 4 Record Android Screen
After you confirm to start the process, the program would record your Android screen automatically. Please click the red button to stop recording.
Method 3: Record Android Screen with Vysor
Vysor is a not only desktop but also a Chrome app that is compatible with all operating systems. It is a powerful and convenient program that helps you to record your Android screen. And it Provides four options for you to choose: Windows, Mac, Linux and Chrome. You can select one and click download to continue.Step 1 Connect Your Device
(Now we take Windows as example)Once you installed the program on your PC. You can connect your device with a USB port.
Step 2 Start Casting
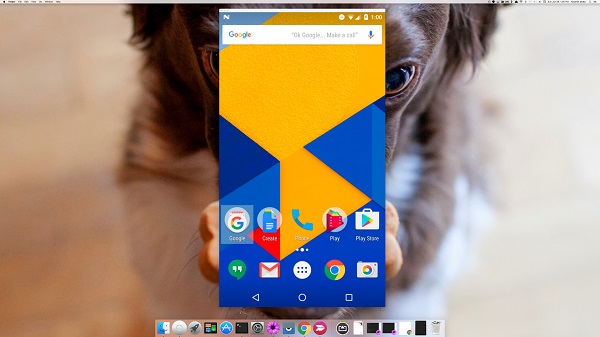
Then you can enjoy all your Android activities on a big screen. Such as downloading applications, texting to your friends, Playing games. You are capable of viewing and controlling your Android with your mouse and keyboard. Now Just enjoy yourself.
As you can see above, the three methods are great and easy to control. You can select any of them to try. If you have any idea or question, please drop us a comment below!


