Android Data Recovery
How to Record iPhone Screen on PC/Mac
-- Wednesday, June 14, 2017
Recording iPhone screen can be a great way to share useful iOS tips & tricks, popular gameplay walkthrough, phone fix solution or show new product features in conference like WWDC. With the release of iOS 11, you are fortunately to record iPhone screen directly on the device with screen recording function. What if you want to record iOS screen on PC or Mac? Here are how to do it.
- Part 1 Record iPhone Screen on Windows without Jailbreak
- Part 2 Record iPhone Screen on Mac with QuickTime
Part 1 Record iPhone Screen on Windows without Jailbreak
You must know that though you can download QuickTime on Windows, you cannot use the complete set of features for some security reasons. If you don't want to jailbreak your iPhone 7/7 Plus and pose a threat to its security neither, iPhone Recorder is a better choice.iPhone Recorder enables you record and capture iPhone/iPad screen in three simple steps. Without security vulnerabilities or data loss caused to iDevice during or after the record and capture process.


Step 1 Connect PC and iPhone to Same Wi-Fi
Make sure that your PC and iPhone are connected to the same wireless network. On PC, you can check it in the Internet Setting at the lower-right corner of the Windows main interface. On iPhone, go to Settings > Wi-Fi to check it.
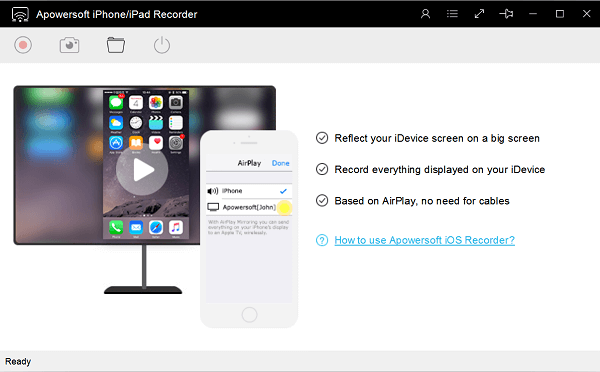
Step 2 Mirror iPhone Screen to PC
Run the software after download and install. Turn to iPhone, swipe Home screen up from bottom to open Control Center. Enable AirPlay Mirroring (iOS 10 or older)/ Screen Mirroring (iOS 11). Then, it will be looking for the smart device that can be connected. When you see iPhone Recorder in the searching result, tap and connect it.
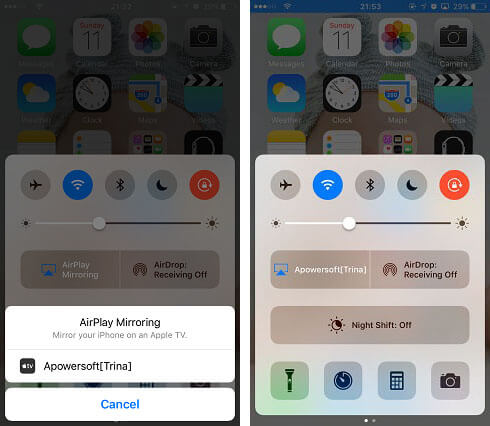
Step 3 Start Recording iPhone Screen
Now your iPhone screen is mirrored to Windows, and hit the Record button to get started. When finished, click the Stop button to end the recording process and save the video clip.

Part 2 Record iPhone Screen on Mac with QuickTime
Since you are the user of both iPhone and Mac, you may find it easy to record iPhone screen on Mac with QuickTime.Step 1 Connect iPhone to Mac via lighting cable.
Step 2 Run QuickTime on Mac.
Step 3 Click File in the toolbar at select New Movie Recording.
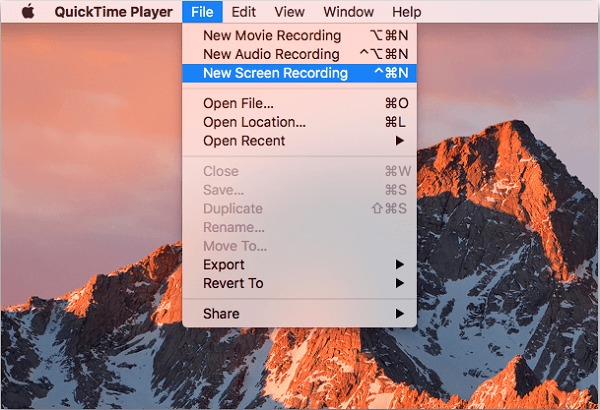
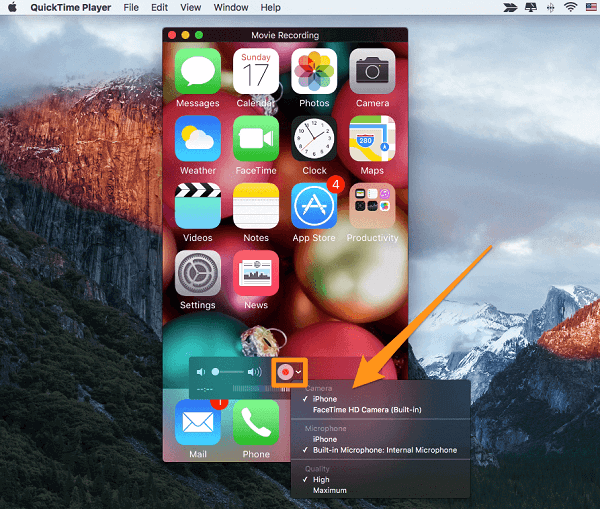
Step 4 When your iPhone pops up, you can hit the Record button to start recording.
Step 5 To change the record settings, you can hit the arrow next to the Record button.
Step 6 End the process and go to File > Save to find the video clip.
From the above, you must get how to record iPhone screen on both PC or Mac. If you merely need to record screen on Windows, iPhone Recorder wins. But if you want to edit the screen recording video, QuickTime may be better to meet your need.


