Android Data Recovery
How to Install Android O in Nexus/Pixel Right Now
-- Friday, July 21, 2017
Note: To install Android O, it requires to unlock the bootloader, which means the data in Pixel or Nexus is at the risk of being erased unintentionally. Thus, we suggest you backup Android data firstly.
Guide to Install Android O in Nexus/Pixel
Supported devices: The Developer preview of Android O now only supports Nexus 5X, Nexus 6P, Nexus Player, Pixel, Pixel C, Pixel XL.Step 1 Set up ADB & Fastboot with Platform-Tools
Head to the website and download the latest SDK platform-tools. Unpack and run the SDK Manager file by following the prompt tips to set it up in the computer. Then, enable USB Debugging on your Android and connect your phone to the computer via USB cable. Next, open up the new platform-tools folder in the previous extracted folder. Press the "Shift" key and right click anywhere in the folder to select "Open command window here". Executive "abd devices" in the cmd window, your phone will appear in the device list when it’s connected.
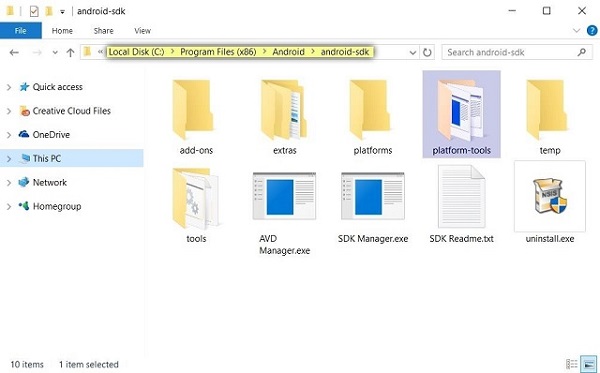
Step 2 Download Android O Image for Nexus/Pixel
Download the factory image Zip that 100% matches your device. It will take you quite a long to finish the large Zip file download. Then, extract the update content from the Zip.
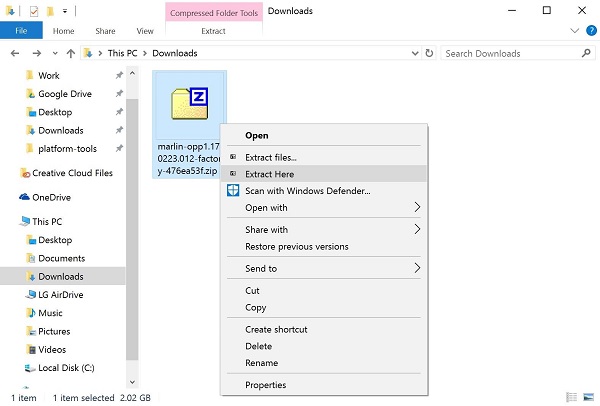
Step 3 Transfer Android O Image Files to Platform-Tools
For most Windows users, follow the directory C:\Program Files (x86)\Android\android-sdk\ to reach the platform-tools folder, then, copy and paste all the Android O Image files that you extracted in the Step 2 into the platform-tools folder.
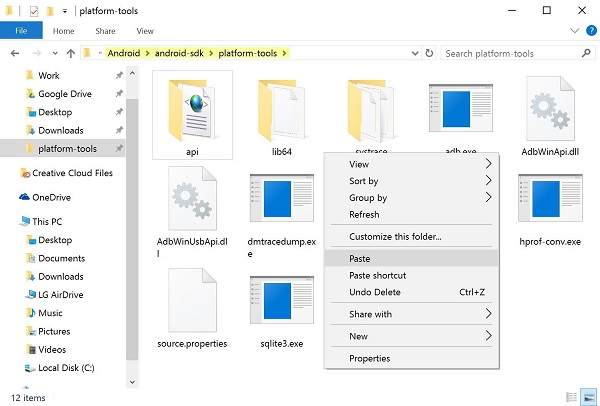
Step 4 Enable OEM Unlocking & USB Debugging
In order to unlock bootloader and flash factory image, you should activate the Developer Options. Check the detail guide here to activate Developer Options menu. When you see "You are now a developer" message, you can go back to the Settings>Developer Options, and enable USB Debugging and OEM Unlocking options.
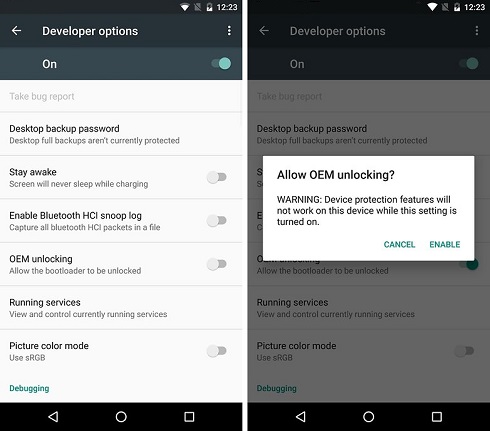
Step 5 Get Nexus/Pixel into Bootloader Mode
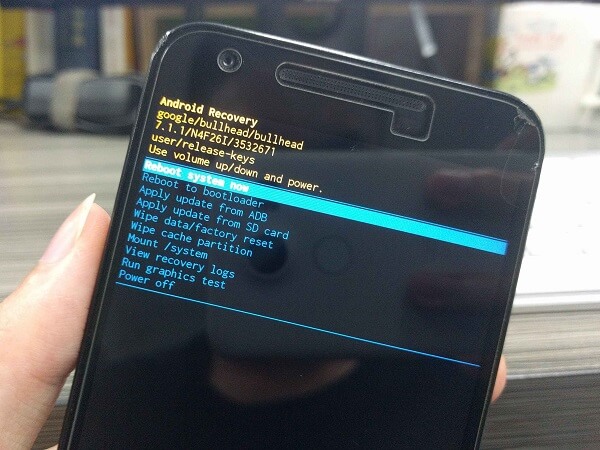
To start with, turn off your Nexus/Pixel. Then, hold the the Volume- and Power button at the same time until you see the interface as below, and select "Reboot to bootloader".
Step 6 Unlock Bootloader on Android
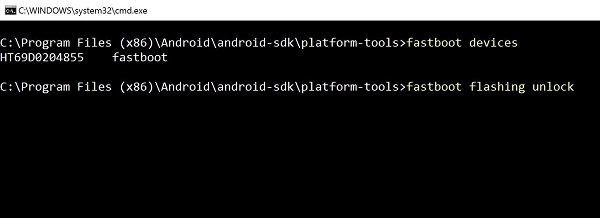
Open the platform-tools folder, hold down the "Shift" key and right click the empty place within the folder. In the pop-up menu, select "Open the command window here". Type in "fastboot devices" in the command window and there will be a series of letters and numbers displayed. If not, you need to go back to the Step 1. Now, type in "fastboot flashing unlock" in the following command. This will wipe data in your device.
Step 7 Flash Android O Image on Nexus/Pixel
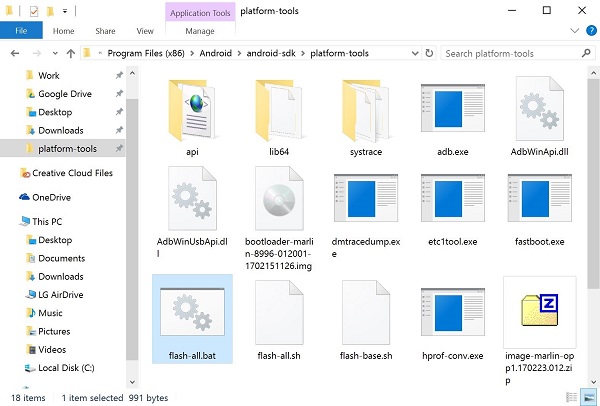
After unlocking the bootloader, return to the platform-tools folder. Double click the flash-all.bat file to install Android O update.
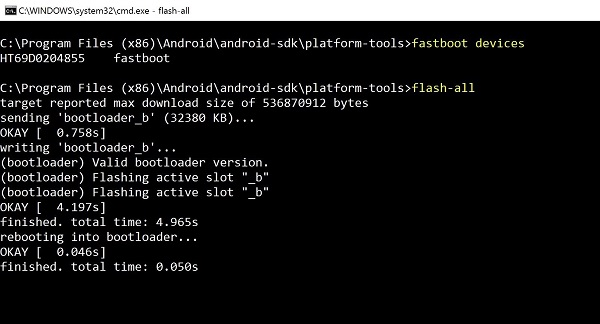
Now, Android O is installing in your Nexus/Pixel. The process will take a while. Just wait until you see "Finished" in the command window. When it finished, your device will automatically reboot, and you can enjoy the awesome new features in Android O.
The procedure to install Android O Beta on your Nexus or Pixel might be a little bit complex. But it’s worthwhile to be the first ones to explore and test out the new features, like Picture-in-picture in Android 8.0. If the upgrade of Android O makes your phone performance worse than before, you can also downgrade it to Android Nougat.


