Android Data Recovery
How to Capture/Record Screen of Samsung Galaxy
-- Friday, January 27, 2017
1. There is something wrong with the Apps or the software on your Android, and you need to ask the related company who sold you the products for technical support. Making multiple marked-up screenshots to show is not a good idea as it takes you so much time and sometimes even could not indicate the problem.
2. Someone should be making demos on behalf of the company to show the product or services you are selling. For example, you are selling an Android device or tablet, and you want to show its function to users directly.
3. Someone wants to ask help to do some settings on Android, for example, enabling the USB debugging. But it is too confused to check up the idea on Internet. Is there any way that can help in a more directly way?
…
When come across the similar cases as the situations above, recording Android screen can be your best choice. Now, I will introduce you a fantastic software which is named Android Data Recovery's new function Screen Recorder. It allows users to capture Android screen in a simple way. Please download and install the program on your computer to have a try!


- Part 1: Record Screen of Samsung Galaxy
- Part 2: Take Samsung Galaxy Screenshot on PC
Part 1: Record Screen of Samsung Galaxy
Step 1 Launch the Program and Connect Device to PCAfter you download and install the Android Data Recovery program, please launch it on your computer. Then go to “Screen Recorder” pane. And you should connect Android to computer via the USB cable. To get the device being detected, you also need to enable the USB debugging on your Android.
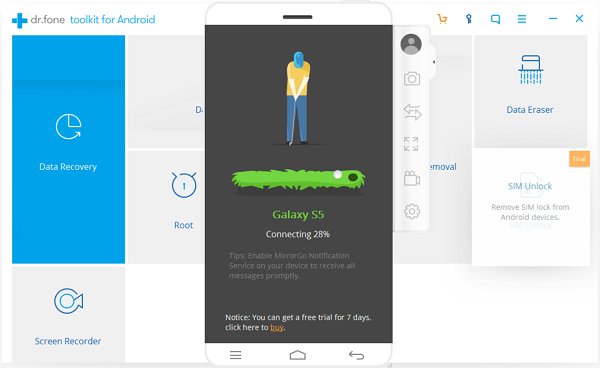
Step 2 Mirror Screen of Samsung Galaxy
After your Samsung is detected by the program, the screen of the device would be mirrored automatically to your computer. You are able to see what you can see on your Samsung Galaxy.
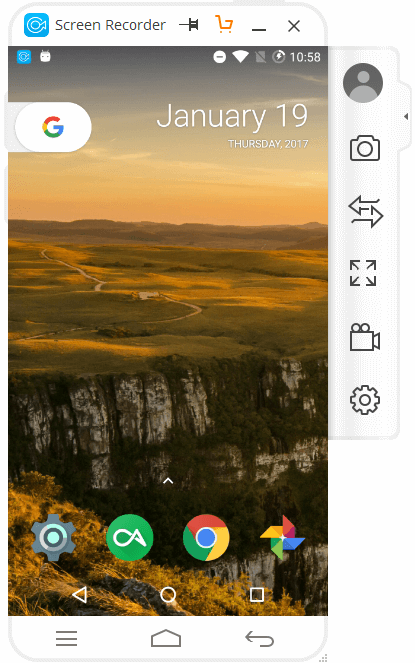
Step 3 Start to Record Screen of Android
To start the recording process, please click on the Android Recorder button on the right navigation bar and continue to confirm it by clicking the "START NOW" button on the pop-up window. Now the program would begin to record your Samsung Galaxy.
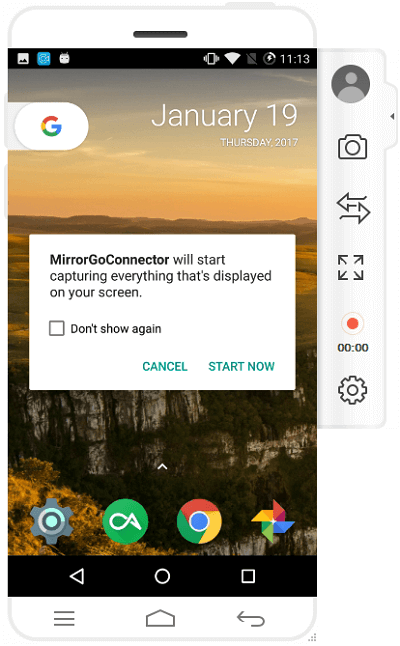
To stop the recording, please click the red button on the right navigation bar. The recorded video would be saved on your computer, and you can click the path on the pop-up window shown on the interface.
Tips: To change the default location of recorded video, please go to "Settings > Record Settings".
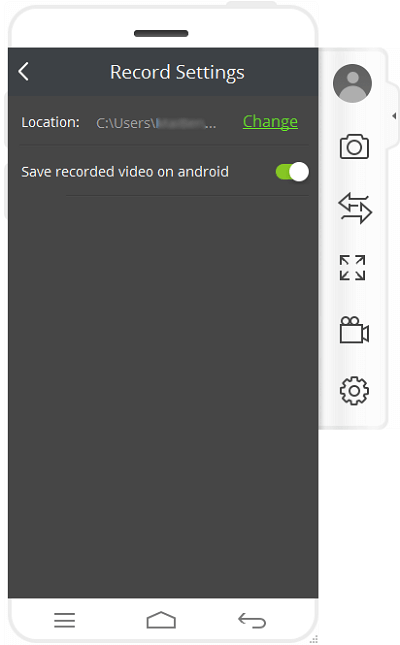
Part 2: Take Samsung Galaxy Screenshot on PC
Android Data Recovery's new function Screen Recorder also allows you to capture the screenshot of Android device easily. Firstly, please connect your device to computer and enable the USB debugging as it is referred to step 1 in part 1.Step 1 Capture Screenshot by One-click
On the interface of the Screen Recorder, the screen of your device would be displayed on your computer. Once you encounter the interface you want to take a screenshot, please click on the Screenshot button on the right navigation pane.
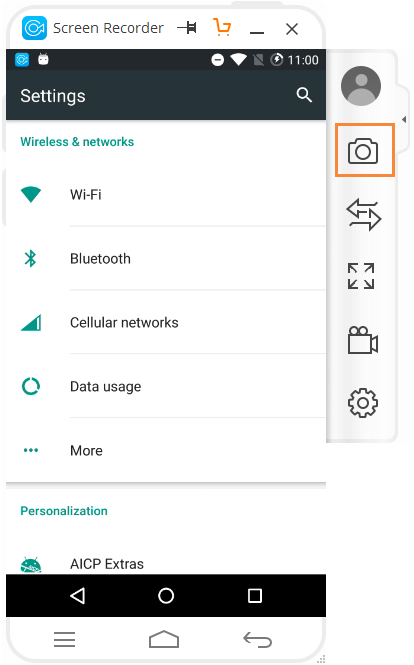
Step 2 Save Screenshot to PC
Once you take a screenshot, a image will show up. You click on the Rotate button to rotate the screenshot and click on the Save button to save it to your computer.
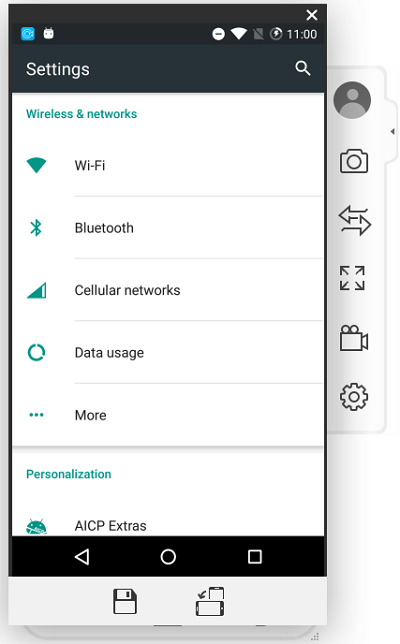
That’s it. With Android Data Recovery's new function Screen Recorder,all you need to do is to have several “click” on the button of the program. Do you have other methods that are easier than it? Any ideas please drop us a comment below.


