Android Data Recovery
How to Retrieve Deleted Messages on Android
-- Wednesday, February 12, 2014
Recent years, we've received many emails from users telling us that they want to get back the sms which are accidentally deleted or unintended lost. As if the data hasn't been overwritten, there is still chance to retrieve the lost messages with data recovery software. So, to prevent the missing text messages being overwritten, you should stop adding new content or deleting existed data in your Android devices, if possible, stop using your phone. Afterwards, turn to reliable and useful data recovery program. If you have no idea which program to choose, you can try Android Data Recovery, which is highly recommended.
Android Data Recovery is an outstanding recovery tool that empowers you to retrieve any data including contacts, text messages, pictures, videos, songs, call logs, and so forth back to your Android device. No matter you are using Samsung Galaxy S6/S6 edge, HTC One M8, LG G3, Sony Xperia Z3, Google Nexus 6, Moto X or others, so long as your device runs Android operating system, you can get your lost data back to your phone at ease with the help of Android Data Recovery. Go on reading the instruction below to see how well it works on Android device.
Download Android Data Recovery below:


Perform Android Data Recovery to Restore Deleted Messages
Step 1 Keep Your Android Device away from Being OverwrittenSamsung Galaxy S5, for example, are excellent phone model for Android users. When losing data, you will be asked not do any operation since than, otherwise your previous backup will be overwritten and what you lost can't be restored back.
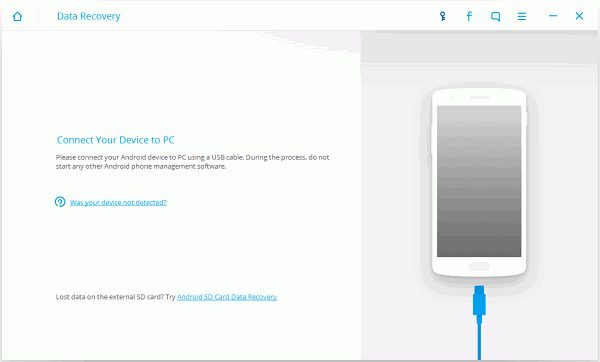
After downloading Android Data Recovery on your computer, launch it and you will see the following interface.
Step 2 Enable USB Debugging after Connecting Android to Computer
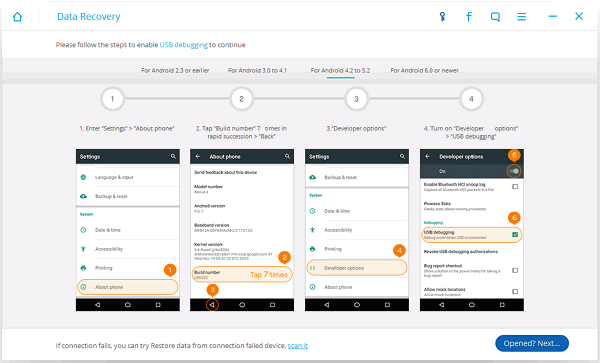
Connect your Samsung Galaxy S5 to your PC via USB cable. You can skip this step if you have enabled USB debugging before. If not, you will be showed the following window.
Follow the instruction below so as to enable USB debugging. Next, we will show you 3 different ways to enable USB debugging for different version of Android operating system.
Choose the one for your Android device and read the instruction carefully.
1) For Android 4.2 or newer: Enter "Settings" > "About Phone" > "Build number" for 7 times. When getting a note telling that you are under developer mode, go back to "Settings" > "Developer options" > "USB debugging"
2) For Android 3.0 to 4.1: Enter "Settings" > "Developer options" > "USB debugging"
3) For Android 2.3 or earlier version: Enter "Settings" > "Applications" > "Development" > "USB debugging"
Step 3 Scan Android Phone for Lost Data
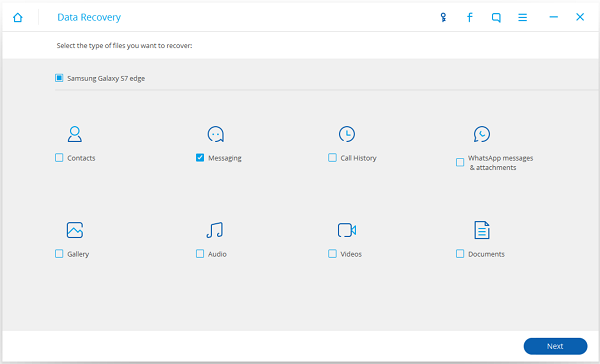
If you want to save your time, you can check the box next to "Messaging" so as to scan your Android text messages only.
Step 4 Scan your Android for Deleted Text Messages
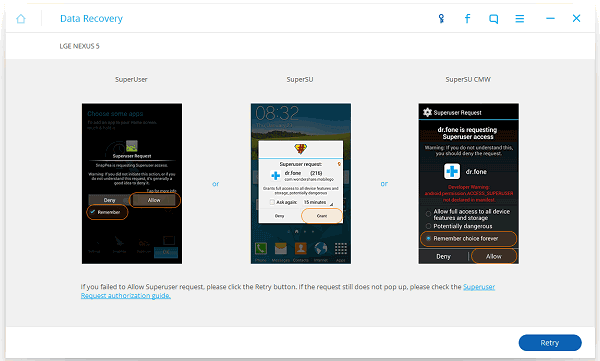
Begin to scan your Android phone after the analysis completes. Go back to the home screen of your Android phone and click "Allow" on it. Then you can return back to your computer and click "Start" to begin scanning your Android phone for lost text messages.
Step 5 Preview and Recover Deleted Messages from Android
As the scanning progress completes, all the recoverable data including contacts, text messages, videos, photos, songs and more are all scanned out and listed in the interface. You can select what you want recovered and click "Recover" to start the recovery.
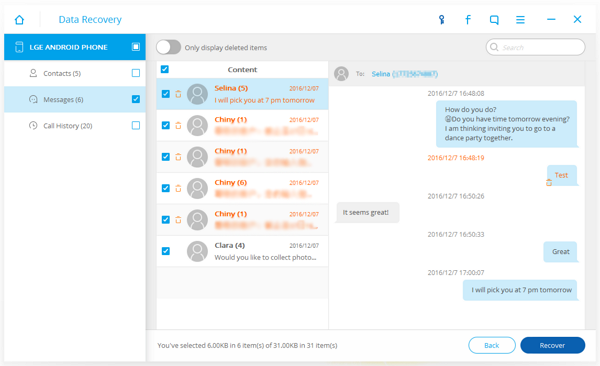
Note: Not only the SMS that you have deleted accidentally, but also the ones that already existing on your phones will be scanned out and listed if you deleted some of these SMS before. You can click "Only display the deleted items" to neglect the existing SMS and choose the deleted SMS that you want back.
Step 6 Frequently Back up Your Android Device to Protect the Files
To prevent your Android phone data from losing, you can try to back up your Android data from time to time so that you don't need to worry that the backup will be overwritten and what you deleted can't come back to you.
Download the free trial version of this Android Data Recovery below to experience the recovery on your own:


