Android Data Recovery
How to Unformat Hard Disk via SATA Cable
-- Tuesday, September 26, 2017
People also read:
SATA(Serial ATA or Serial Advanced Technology Attachment), is an IDE standard for connecting and transferring data from hard disk drives to computer systems. In this way, a SATA cable usually makes a connection between motherboard and the SATA hard drive. If you yearn to unformat and recover data from SATA hard drive, this guide will help and please check it out below.
Guide to Unformat Hard Disk via SATA Cable
To recover files from SATA hard disk, you need to firstly download and install Data Recovery program on your computer. Data Recovery is a pretty effective program that will help to recover data from hard disk, whether it is lost or formatted.


Step 1 Plug Hard Disk to Computer
After you successfully install the program, please launch it on your Windows/Mac. Now plug your hard disk to computer via the SATA cable.
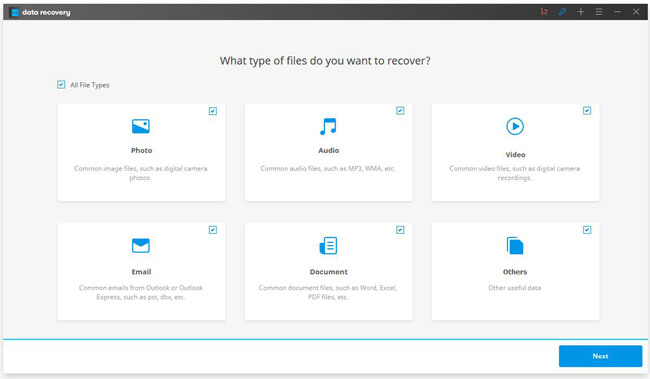
Step 2 Choose File Type You Want
On the interface, you can choose the file types you want to recover from the SATA hard drive. Then click on the "Next" button to continue.

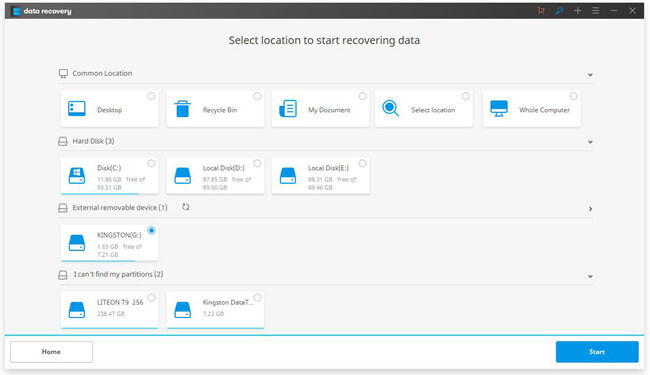
Step 3 Select SATA Hard Drive
Now, you may see your SATA hard disk detected and displayed under the "External removal device" menu. You should select it and continue to click on the "Start" button.

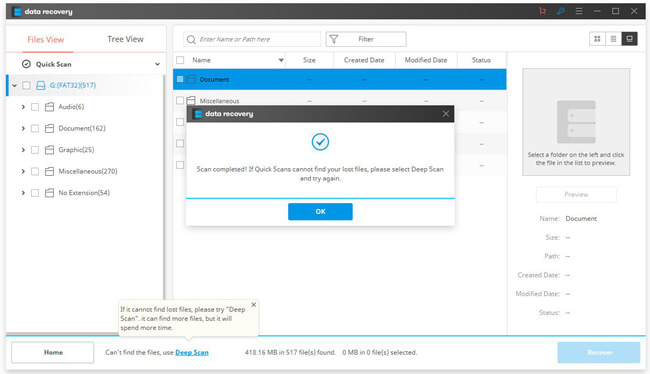
Step 4 Unformat Hard Disk
The program would scan the selected hard drive and all you need to do is waiting till the process ends. By the way, if you cannot see the wanted data, you are recommended to use the deep scan mode to scan the hard drive again.

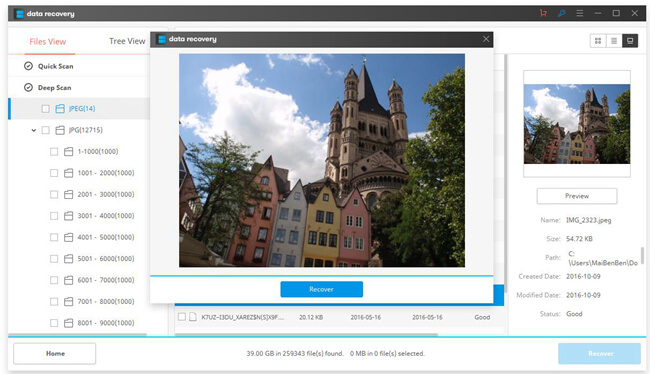
After that, you are able to preview the scanned-out files and then recover data from SATA hard drive. Please just click on the "Recover" button on the interface.

The job is done! Only four simple steps with several clicks, you are able to unformat hard disk and then recover files from the SATA hard drive. It is worthwhile to give it a shot, isn’t it? So if you have any question or problem when using the Data Recovery program, please drop us a comment below!


