Android Data Recovery
Mac Recovery – Recover Data from Mac Hard Drive
-- Thursday, October 19, 2017
Also Read:
- Part 1 Repair Hard Drive with Disk Utility on iMac/Macbook
- Part 2 Recover Data After You Migrate OS to SSD
Part 1 Repair Hard Drive with Disk Utility on iMac/Macbook
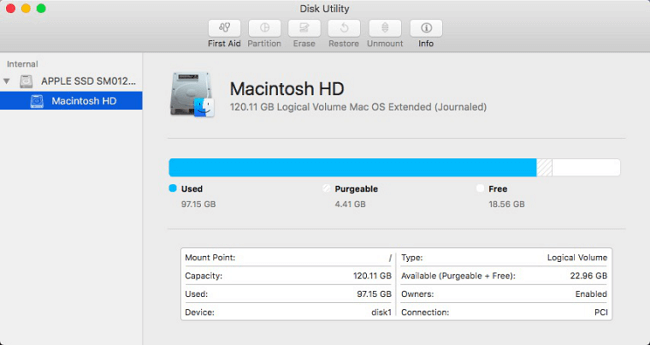
If your Mac begins to show signs of trouble, like flashing question mark or flashing global on boot, you'd better suspect it is the hard drive problem. As you know, there is a partition manager built-in macOS, called Disk Utility. Disk Utility can fix the certain drive problem. Let's check how to repair Mac hard drive below.To access Disk Utility, you can directly search it by clicking the Spotlight icon at the upper-right corner of the main interface. Launch Disk Utility, you can see the toolbar in the top-middle. Click the First Aid which can check the volume for errors and fix them. Just follow instruction to repair hard disk on Mac.

Notice: First Aids needs to lock the boot volume temporarily, which will also lead to boot volume frozen and no response.
Part 2 Recover Lost Data from Mac Hard Drive
After fixing the Mac internal hard drive, now you can restore data from it. To recover macOS hard drive is quite complex, but with Mac Data Recovery, it will be much easier.Mac Data Recovery enables you to restore various kinds of data, including photos, videos, music, document, etc. From Macbook/iMac. No matter your hard drive is formatted or partly broken, Mac Data Recovery is capable for you to recover data from it. Read on and check it.


Step 1 Select Lost Data Types
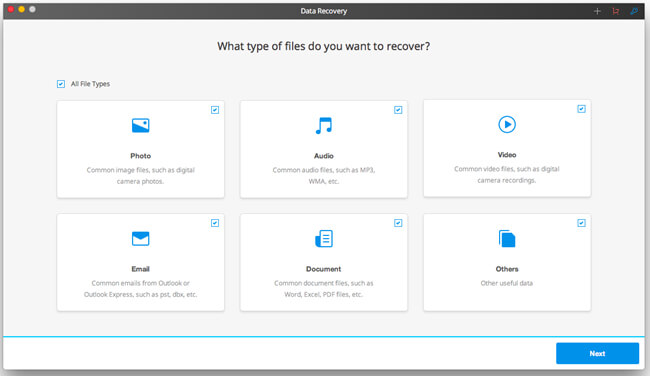
Download Mac version of the software on your Macbook/iMac. If you are using PC, please download the Windows version. Run the Mac Data Recovery after install. Select the data types that you want to recover.

Step 2 Choose Location to Scan
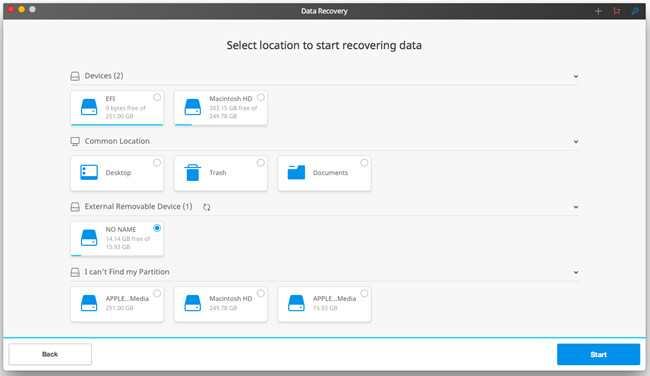
Select the target location where you used to store the deleted files, and hit the Start button to move on. If you cannot find the disk, you can click the "I can't Find my Partition" option to locate and select the one you need.

Step 3 Preview and Recover Data from Mac Hard Drive
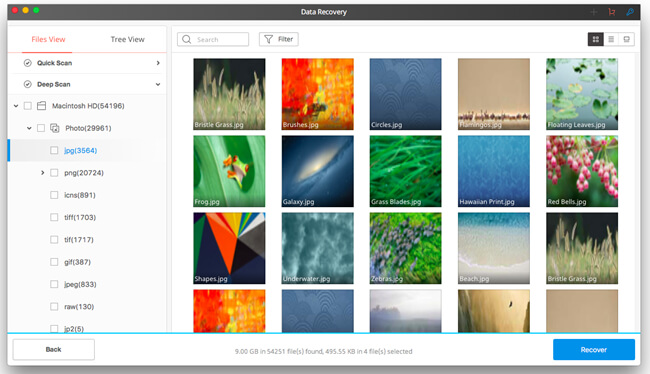
If the Quick Scan mode cannot scan out the data you need, you can turn to Deep Scan mode. Once the process is done, you can see all files listed in the scanning result. Double click to preview the files in detail. Then, select those you need and hit the Recover button.

From the above, you must know how easy to fix Mac disk trouble and recover data from hard drive on Mac. So next time when you see the trouble signs on Mac, just do as the above guide shows you.


