Android Data Recovery
Freeware to Migrate OS to SSD on Windows 10/8/7
-- Friday, October 06, 2017
People also read:
In this article, you will see a free guide to transfer HDD to SSD on Windows. And if the there is a data loss after the process, you can recover the files easily with a data recovery tool. More details please continue to read.
- Part 1: Free Way to Migrate OS to SSD on Windows 10/8/7
- Part 2: Recover Data After You Migrate OS to SSD
Part 1: Free Way to Migrate OS to SSD on Windows 10/8/7
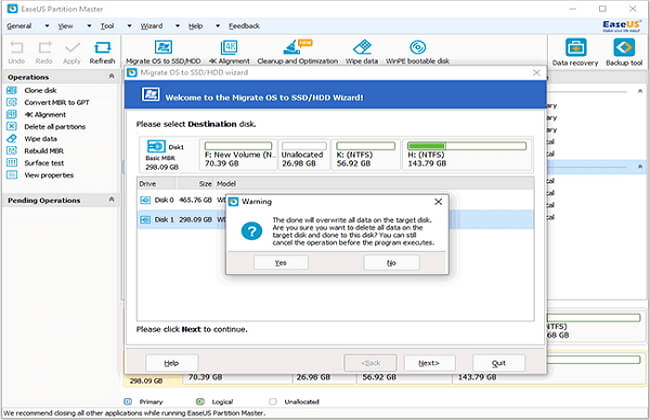
If you want to move, transfer and migrate OS to SSD, EaseUS Partition Master tool can help. Now, please download and install it on your computer and follow the guide below to easily achieve the job.Step 1 After you get the EaseUS Partition Master program installed, please launch it on your computer and then select "Wizard > Choose Migrate OS to SSD/HDD" on the interface.
Step 2 Select your SSD as destination disk. You may see there are some partitions on the destination disk. Just click on "Yes" to delete them. Now, you need to click on the "Next" button to continue.

Bear in mind that you should confirm to delete the partitions on the destination hard disk or click back to choose another destination hard disk and thus you can move on smoothly.
Step 3 Please place your mouse pointer on the left or right partition handle and you can change the partition size you want.
Part 2: Recover Data After You Migrate OS to SSD
After you migrate HDD to SSD, some of you may find out that you suffer a data loss on your hard drive. Please don't worry about it and you will see the solution here.To begin with, please download the Data Recovery tool by clicking the download button below. Data Recovery is a prevalent program that aims to recover lost data on computer. Now, please follow the guide below to get lost data back.


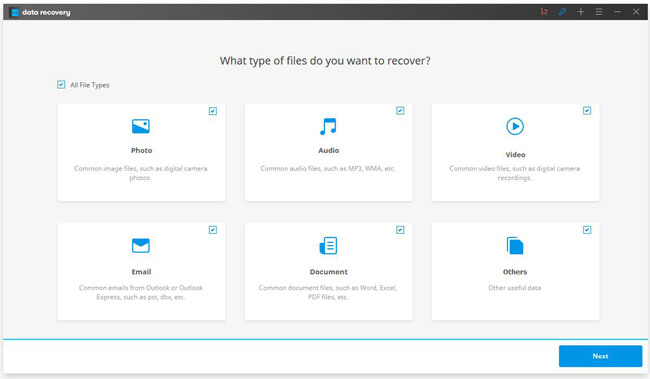
Step 1 After you download and install the Data Recovery, please launch it on your computer. Now, you can choose a specific file type, or just select all of them. Please click on the "Next" button to continue.

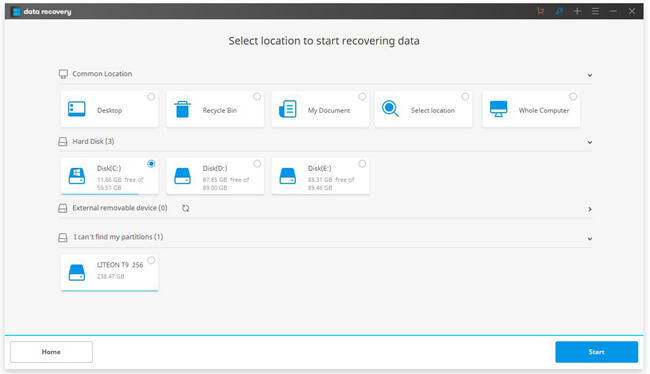
Step 2 On the interface, you can see the different locations displayed. Choose the one that you lose data on and click on the "Start" button.

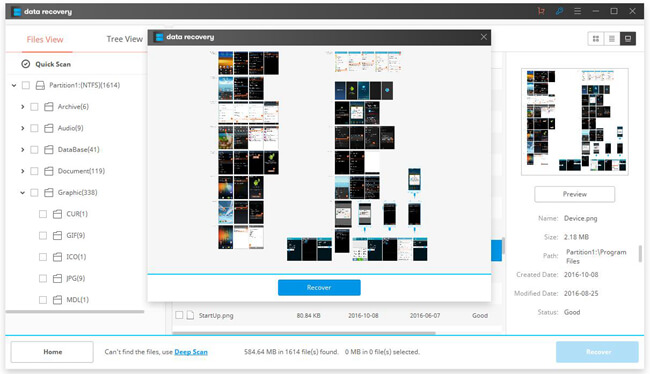
Step 3 The program would start to scan. After the scanning process completes, you can preview the files and then recover them on your computer.
Note: The program would scan your disk with Quick Scan mode by default. If you cannot see the data you want, please use the Deep Scan mode to try again.

In this way, you can recover lost data after you migrate HDD to SSD on Windows. If you have any question about this guide, please leave your comment on the below area to let us know!


