Android Data Recovery
What to Do if EaseUs Data Recovery Crashed & Not Respond
-- Friday, September 29, 2017
"easeus data recovery took a long time on deep scan and stuck, how to go pass it?"
"easeus data recovery suddenly crashed and force quit, anyone encounter this?"
"data recovery wizard stop working and not responding, it happened 3 times, how to fix?"
If you also met the errors above, here you can find the solutions.
Also read:
- Part 1. Fix EaseUs Data Recovery Crashed & Frozen & Stop Working Errors
- Part 2. EaseUs Data Recovery Wizard Alternative
Fix EaseUs Data Recovery Crashed & Frozen & Stop Working Errors
According to the tech support team, most users encounter software crashed and frozen, are using the EaseUs Data Recovery Crack. This is the non-official version, which is activated with unauthorized code, will inevitably lead to software crashed, or even caused system damage.Step 1 Download the copyright version of EaseUs Data Recovery and login the software with the unique activation code that you received after purchasing.
Step 2 Run the program and click Deep Scan to scan for lost data in your PC, hard drive or any other devices. Check the scanning is progressing or not, if no, move to the next step.
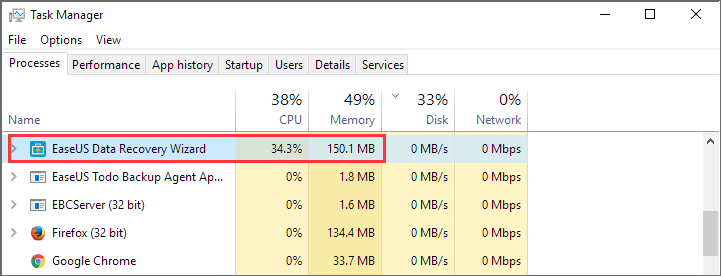
Step 3 Right click the taskbar in main interface of PC or press Ctrl+Alt+Delete to get into Task Manager. There you can tell if EaseUs Data Recovery stuck or not from the Memory column. If the Memory shows 0%, that means the software stops working. Otherwise, please wait for the scanning process finish.
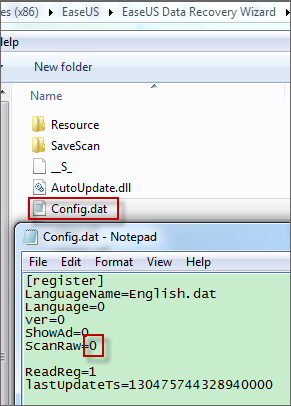
Step 4 Locate where you install EaseUs Data Recovery and disable raw files. To do this, open Config.dat file with Notepad on Windows and revise 1 to 0 of ScanRaw.
Part 2: EaseUs Data Recovery Wizard Alternative
If you still cannot fix the EaseUs crashed or hang up problem by following the steps above, you can turn to Data Recovery.Data Recovery enables you to quick or deep scan deleted data on hard disk, flash drive, PC, Mac and more. It provides high scanning and recovery quality, which means it can perform complete scanning in fast speed and recover lost data intactly. Also, it seldom crashes, freezes up or stuck in deep scan. Check it below.


Step 1 Select Deleted Data Types
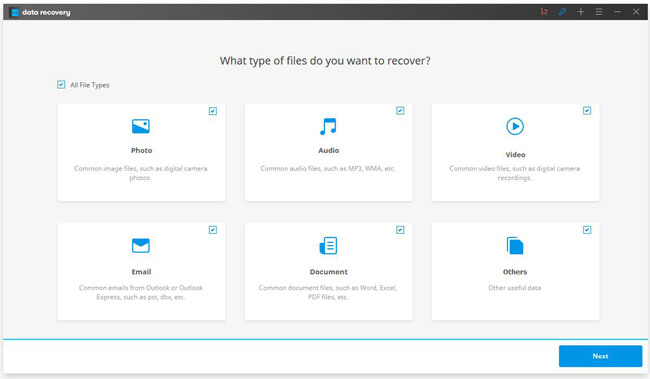
Run Data Recovery after install. First of all, tick the lost data type that you want to recover. It allows you to recover photo, audio, video, email, document and more data types. Choose those you need and hit Next.
Step 2 Choose Location to Scan
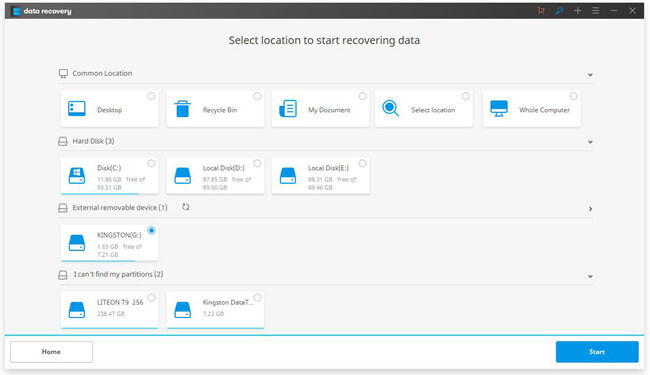
Select where the delete data located. If it’s an external hard drive, you need to connect it to PC via SATA cable. As for other removable device, just connect it to the computer via USB cable. In case you don’t know exactly where it stored, just select the "Whole Computer" option and get started.
Step 3 Recover Deleted Data on PC
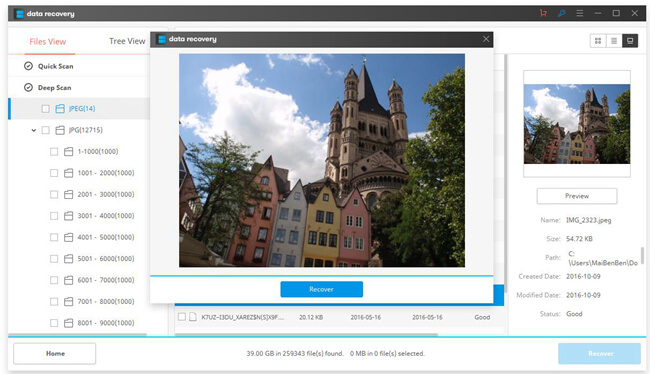
If the Quick Scan mode cannot scan out many lost files, the software will recommend you Deep Scan mode. When the scanning process completed, you can preview the files in detail. You can restore the whole folder at a time or selectively recover single files.
Do the above methods work for you? Just share with your friends if it did work. If you have any question or better solution, please let us know.


