Android Data Recovery
Need to Exit Recovery Mode After iOS 10 Upgrading
-- Tuesday, September 20, 2016
- Part 1. The Guide of Installing iOS 10
- Part 2. Exit Recovery Mode After iOS 10 Upgrading with iPhone Data Recovery
Part 1. The Guide of Installing iOS 10
1. Please go to your iPhone and tap "Settings" on the home screen, then choose "General > Software Update". And you can see the information of new iOS 10 version is displayed on the screen. Please tap "Download and Install" in blue.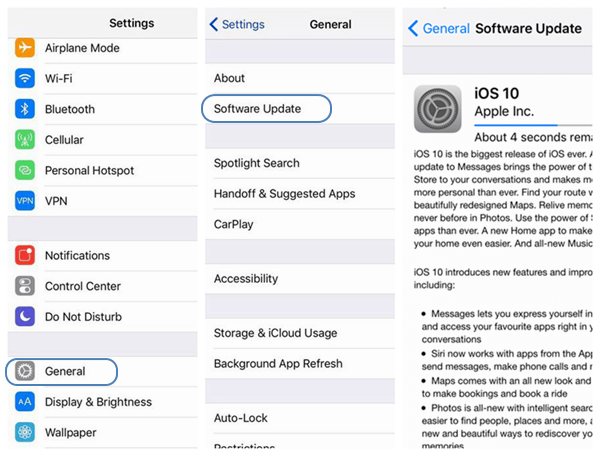
2. Enter the passcode and tap "Agree" to the Terms and Conditions about the new version.
3. Confirm the selection and your iPhone would reboot to install the new iOS 10. Please wait for the upgrade to the end.
Note: Your iPhone may be stuck into White Apple Logo or can't get out of the Recovery Mode after you download the iOS 10. Please continue to read and you will find out the solution.
Part 2. Exit Recovery Mode After iOS 10 Upgrading with iPhone Data Recovery
Please try the iPhone Data Recovery, which can help you to get your iPhone back to normal.Just click the download button below to install the program and follow the steps to exit Recovery Mode.


Step 1 Launch the Program and Connect iPhone to PC
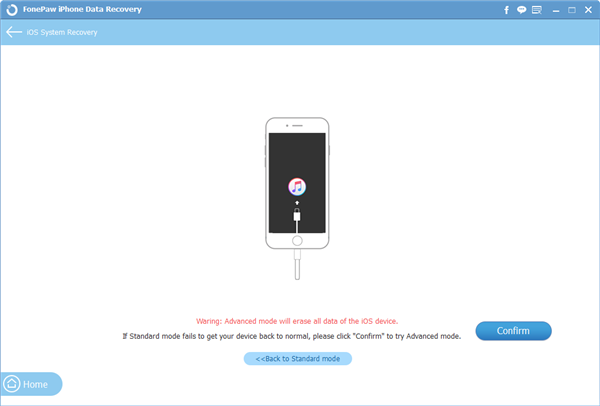
Please run the program after the download completes. Then click "More tools > iOS System Recovery" and connect your iPhone to computer via USB cable that is matched. If it is connected successfully, you can see the interface as below. Then click "Confirm" to continue.
Note: The program can fix with various iOS system issues like Recovery mode, DFU mode, white Apple logo, black screen, looping on start, etc.
Step 2 Put iPhone into Recovery/DFU Mode
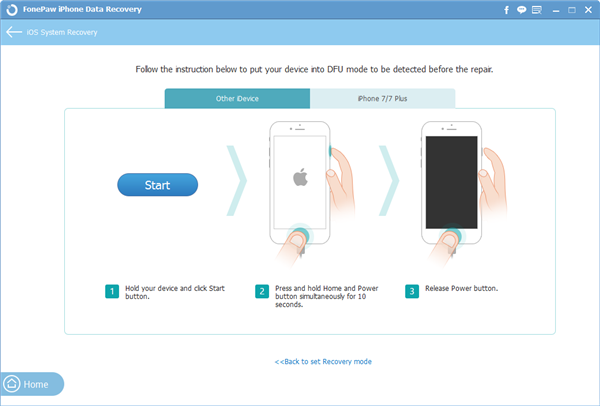
Please follow the guide on the interface to get iPhone into Recovery/DFU mode. But if your iPhone has been in Recovery mode or DFU mode already, you can just ignore this step and go to step 3 directly.
Step 3 Download the Suitable Firmware
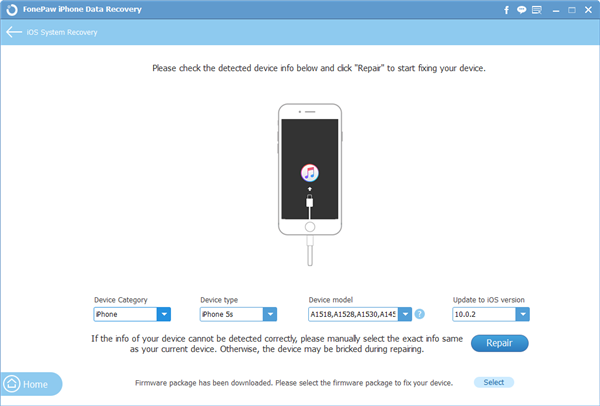
The program would detect the model of your iPhone automatically and what you should do is to confirm the information is matched or not. If it is not correct, you can choose the right one from the combo box. Then click "Repaire" and the program would download the latest firmware for you.
Step 4 Repair the iPhone
After the download is finished, the program would start to fix the system. But when it is repairing, please keep your iPhone being connected. You can see the interface as below as soon as the operating system repairing is done. And you can get your iPhone to the normal mode.
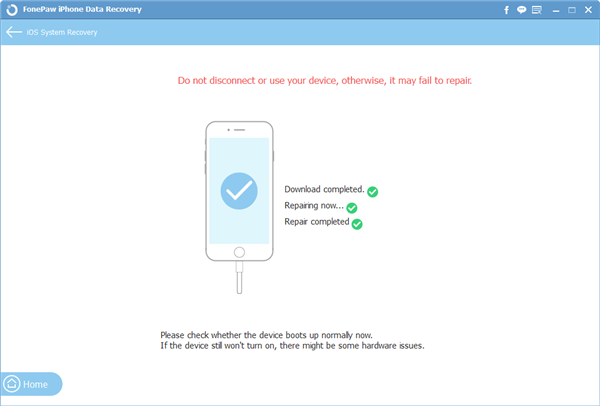
As you can see above, you can fix the iOS system issue in four simple steps and all you need to do is to click the buttons and the program would repair your iPhone automatically without data loss. So why not have a try? If you have any questions, please contact us!


