Android Data Recovery
Convert RAW to NTFS without Losing Data Command Prompt
-- Monday, October 09, 2017
People also read:
To fix the RAW error, bear in mind that you should take no action on the pop-up window which ask to format. Please follow the guide in this article and you are able to convert RAW to NTFS without losing any data.
Guide to Convert RAW to NTFS without Losing Data Command Prompt
If you come across the RAW error and fail to access the drive, you should firstly recover the RAW files with a recovery tool. Then you can continue to convert RAW to NTFS. Now, let’s see how it works.Step 1 Download A Recovery Tool
Please download and install Data Recovery program on your computer by clicking the following button. Data Recovery program, a prevalent recovery tool globally, is designed to recover lost files from hard drive.


Step 2 Select Files Types
After you install the program, please launch it on your computer. Then you would be asked to select the data types you want to recover. Select the important ones and click on the "Next" button.

Step 3 Choose RAW Disk
Now, select your RAW drive on the interface and click on the "Start" button to continue.

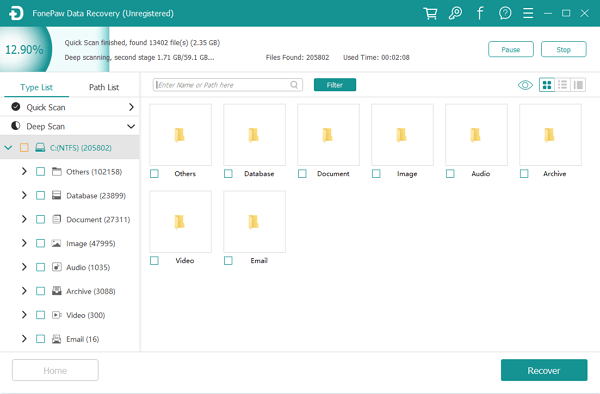
After that, the program would start to scan the RAW drive and looking for the data for you. And you are recommended to try "Deep Scan" mode if you cannot see the desirable data with "Quick Scan" mode.
Step 4 Recover RAW Files
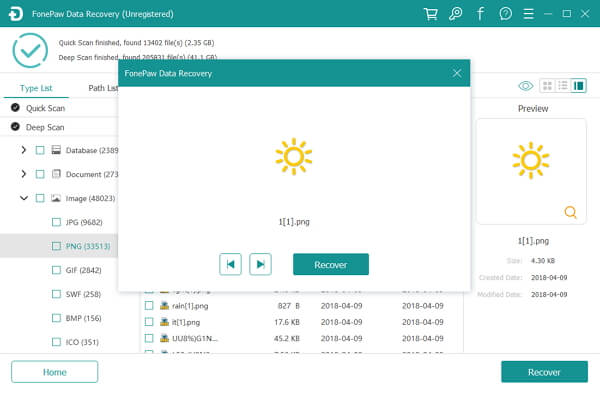
After the scanning, you are able to preview the data and then click on the "Recover" button to get the RAW files back on your computer. In this way, you are able to save you important data even though you are not able to access the RAW drive normally.

Step 5 Convert RAW Drive to NTFS
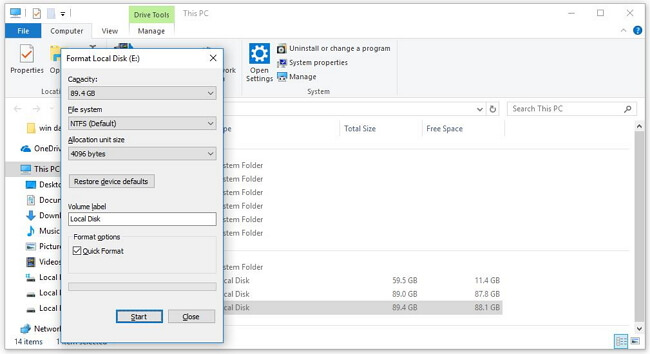
Go to "PC/My Computer" on your desktop screen and right click on the RAW drive. Then choose "Format" and set the file system as "NTFS". Click on the "Start" button and the job is done!

After you change your RAW drive to NTFS and get it formatted successfully, you will be able to access the hard drive normally without data loss as you have recovered them on your computer before. If you have any question about this guide, please drop us a comment below.


