Android Data Recovery
How to Recover Deleted Text Messages from Nexus
-- Friday, January 29, 2016
Android Data Recovery is an excellent data recovery program for Android smartphone and tablet users. With this mighty software, we can not only recover Nexus text messages, call history, but also other data types on our Android phones (Samsung, HTC, LG, Sony, Motorola, Google Nexus, OnePlus, ZTE, etc.). Supported device is not what you have to worry about. All Android devices that runs from Android 2.3 to Android 6.0 including Google Nexus 6P/6/5X/5, Nexus 10/9/7 and more works perfectly on this tool.


How to Recover Deleted Text Messages from Nexus Phone/Tablet
Step 1 Prevent Nexus SMS from Being OverwrittenDo not add or delete any data on your Google Nexus phone. If unfortunately, you’ve added/deleted something on your Android phone, the losing text messages might be gone forever. So, just leave your Google Nexus alone and turn to Android Data Recovery for help.
Step 2 Install Android Data Recovery on PC
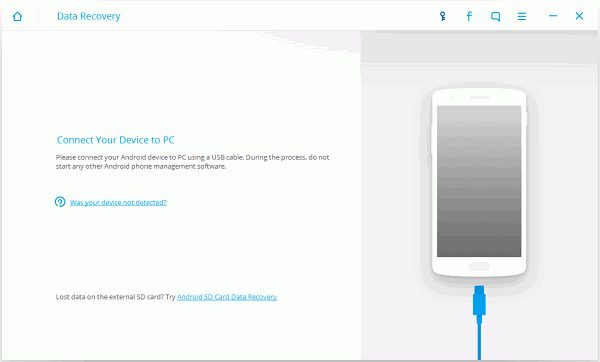
Download and install Android Data Recovery on your computer and launch it. Then, you will be asked to connect your Google phone/tablet to the computer. Just use the USB cable and connect your Google Nexus to PC.

Note: If you can’t connect your Google Nexus to the computer, please make sure that the USB debugging has been enabled on your Nexus. If it has never been enabled, follow step 3 for USB debugging enabling.
Step 3 Enable USB Debugging on Google Nexus
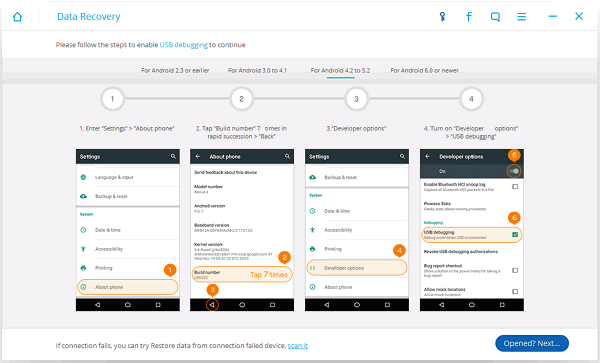
You can follow the corresponding steps below to enable USB debugging on your Google Nexus:
1) For Android 4.2 or later: Enter "Settings" > Click "About Phone" > Tap "Build number" for 7 times until getting a note "You are under developer mode" > Back to "Settings" > Click "Developer options" > Check "USB debugging"
2) For Android 3.0 to 4.1: Enter "Settings" > Click "Developer options" > Check "USB debugging"
3) For Android 2.3 or earlier: Enter "Settings" > Click "Applications" > Click "Development" > Check "USB debugging"

Step 4 Choose to Scan Your Google Nexus Messages
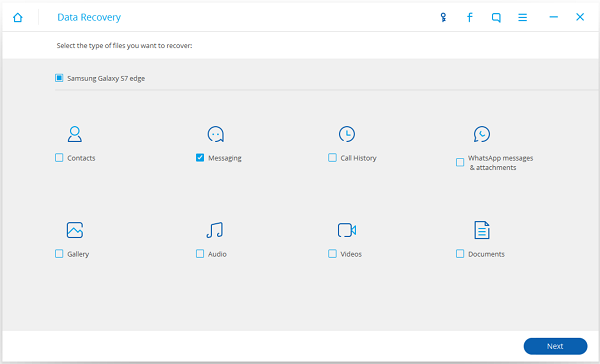
Now, when your Nexus 6P/6/5X/5 is well connected to the computer, Android Data Recovery will detect your phone. You can choose the data types you want to scan. You will see contacts, messaging, call history, WhatsApp messages & attachments, gallery, audio, videos and documents. You can choose "Select all" to have all the files on your Google Nexus scanned, or you can only tick "Messaging" and tick "Next" to move on.

Step 5 Preview Before Recovering Deleted Text Messages from Google Nexus
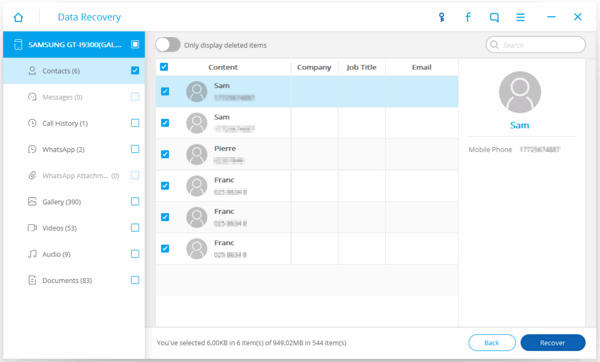
Before long, all the SMS and MMS on your Google Nexus phone will be detected and scanned out. Deleted ones will be in red and the existing one will be in black. You can click on the text messages that listed and you can preview the message content in the right column in the interface. Not only messages contents, but also date, phone number and contact names can be recovered. Tick all the lost text messages you want to recover from Google Nexus and click "Recover" to start the process.

Note: You can also turn on "Only display deleted items" toggle on the top to see the deleted messages only.
Step 6 Back Up Google Nexus For Safety
To prevent bad things from happening again, a backup will be recommended. Please form a habit of backing up Android phone so that when losing data or something else, you can minimize the loss it has caused.
Now, with the simple steps mentioned above, your deleted text messages on Google Nexus are recovered and saved on your computer. You can move them to your Nexus with ease whenever you want. Android Data Recovery is such an excellent tool, isn’t it? Besides text messages, you can also retrieve contacts, call logs, videos, photos, music and more from different Android devices. For the detail steps, please check the related articles below.


