Android Data Recovery
ASUs ZenFone Phone Photo Recovery
-- Saturday, October 10, 2015
According to the post from the forum ASUS Zen Talk, this user lost some of the images after updating ZenFone without doing a backup. It seems that images are gone forever. But in fact they are temporarily removed and stored in a virtual "Recycle bin". We suggest him (maybe every one reading this passage for photo recovery solution) stop using the phone in case of data overwriting. Then download Android Data Recovery from our website and try to regain missing photos.
Android Photo Recovery is your best choice. It is developed to help Android users solve photo loss issue. The program can scan and restore deleted images from your ZenFone by following the path "connect > scan > recover". Accidentally deleted/formatted photos can be restored with only 5 steps. The program is fully compatible with ASUs ZenFone, ASUs ZenFone 2, ZenFone 5, and so on. Download the program and start retrieving photos from ASUs.


Recover Missing Photos and Pictures from ZenFone
Step 1 Connect ZenFone Phone to ComputerNote:
1. Make sure the phone battery is no less than 20%.
2. Do not start any other Android management program except Android Photo Recovery.
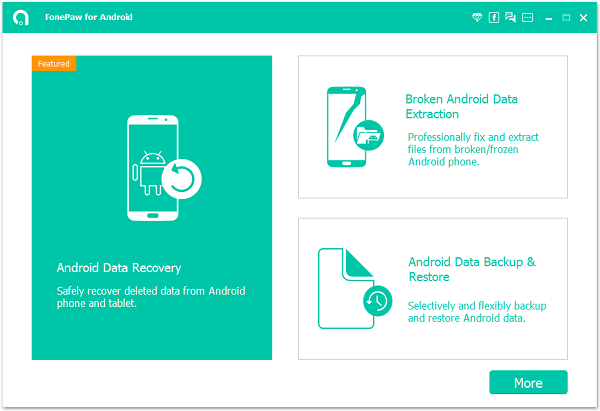
To begin with, install and run Android Data Recovery on a computer. Then connect ASU ZenFone to the computer and enable the USB debugging on the phone.

Step 2 Select File Types to Scan
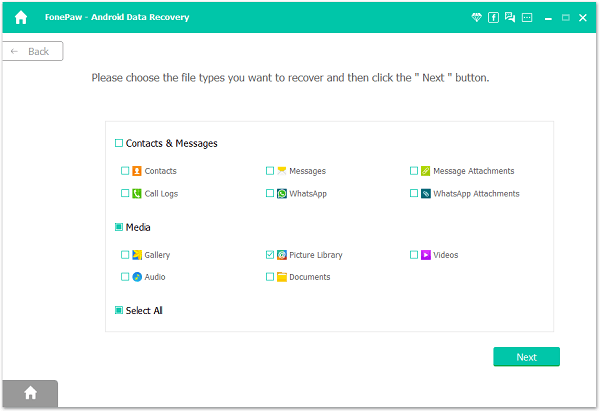
You can select files types in this step. Choose "Gallery" and "Picture Library" in the menu. Then navigate to the button "Next".
After that, you can choose the scan mode. Alternatively select "Scan for deleted files" or "Scan for all files". Then click the button "Next" and "Start".

Step 3 Allow to Scan Android
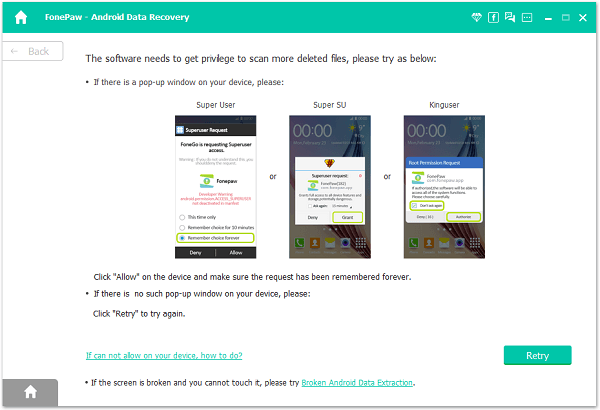
Before scanning, you should tap the "Allow" button in the pop-up window on your Android to authorize the program to analyze your device.

Step 4 Scan and Recover Photos from ASUs
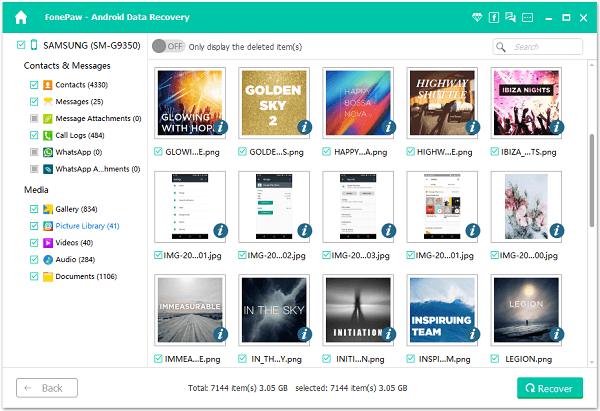
Android Data Recovery will scan photos. If you previously chose the mode "Scan for deleted files", the program would scan for deleted pictures only. Otherwise, all photos would be found.
When scanning is finished, choose "Gallery" and "Picture Library" at the left pane. Then you can preview items one by one. Name, size, and format will be displayed. Check the one you want to recover and click the "Recover" button, they will be retrieved and stored in your computer.

Perfect job! You have regained images if you follow the path we post. If not, just feel free to send messages to us. We will help you solve your problem as soon as possible. But we also suggest you to back up your phone data regularly for sake of data security.


