


Android Data Recovery


How to Recover Photos, Videos from LG
-- Wednesday, June 19, 2013
Android Photo Recovery is an outstanding recovery tool which fits almost every Android photo no matter you using Samsung, HTC, Sony, LG or others. You are able to recover the lost data with several simple steps. So why not just download the trial version of Android Photo Recovery for free on your computer and give it a shot?


Next are the details on recovering LG data back. You can download and install Android Photo Recovery well on your computer and read carefully what is being told.
Part 1: Steps to Retrieve LG Lost Videos & Photos
Step 1 Keep Your Android Data Free from Losing ForeverBackup files are easily overwritten even if you just add one photo. So, we'd better stop operating anything and look for the excellent data recovering tool - Android Photo Recovery on your computer and read the below step to extract them back.
Step 2 Connect your LG to the Computer
After you have downloaded and installed the program, please launch it. The program will ask you to connect your LG to the computer with the USB cable. You should make sure that you have your LG well connected the whole procedure.

Step 3 Enable USB Debugging of your LG Optimus
After connecting to the computer, you will be asked to enable USB debugging. Different operating system has different setting way.
1. For Android 4.2 or newer: Enter "Settings > About Phone > Build number" for several times until you get a note saying that "You are under developer mode". Then, go back to "Settings > Developer options > USB debugging".
2. For Android 3.0 to 4.1: Enter "Settings > Developer option > USB debugging"
3. For Android 2.3 or earlier: Enter "Settings > Applications > Development > USB debugging".
Note: Apart from enabling USB debugging, you should pull down the dropdown menu, then swith mode in between "MTP" and "PTP". See the screenshots of LG devices below:

Step 4 Have your LG Optimus Analyzed and Scanned
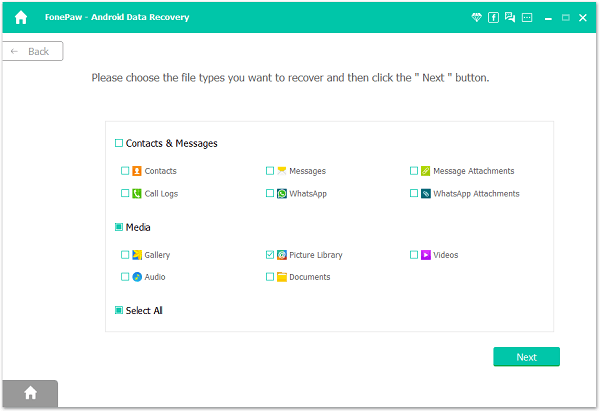
After setting the USB debugging, you've entered the scanning mode. The program will ask to have your LG analyzed. What you need to do is just to permit it. You can have your device analyzed and scanned. And you will see the following window like that.
Choose "Photos" and "Videos" and wait for the scan. It won't take you a long time.
Step 5 Preview and Recover your LG Lost Videos/ Photos
The scanning won't last long. It depends on the amount of the data you stored. The less you've stored, the shorter the time will be. After all the data scanned out and listed in category, including the lost one and the existing one. You can set to only display the lost data on the program. Then, preview the listed data one after another and pick out those you want back. After you finished, click "Recover" to save them all back.

Part 2: Where You Can Find Your Media Files?
People may be confused about the location of photos and videos sometimes and have no idea where they are saved on Android. Actually, it depends on the sources where they come from or the way you get them saved. Here I want to show you a brief guide below.1. On the screen of the device, please tap "My Files" App.
2. Then navigate to the "Device Storage" and you can see different folders on it.
If the pictures you want to check are from the website and you downloaded on your Android, you need to go to "Download".
If the photos are captured by the camera of your Android, please continue to go to "DCIM > Camera".

When you want to check the videos on your device, you can navigate to "Videos" or "DCIM > Camera".
As for the screen shots you made, you need to go to "DCIM > Screenshots".
3. In this way, you are able to check the different types of photos or videos on your Android.
You'd better form a habit of backing up your Android device regularly in order to prevent the data from losing. To back up and for further use, you can use Android Transfer to back up your Your Android.

Ivy Bruce is the Founder and Editorial Director at Recovery-Android Studio. You can also find her on Google+ and Twitter.
![]()
![]()
![]()
![]()


