Android Data Recovery
How to Recover Deleted iPhone Data after iOS 9 Upgrade
-- Sunday, August 10, 2014
“I have annoyed that I lost my files after my iPhone was upgraded iOS 9, such as iPhone contacts, photos, videos, messages, bookmarks and so on. My boyfriend told me that may be it is because i have upgraded iPhone from iOS 8 to iOS 9 with an incorrect way. But how can i recover my lost data on iPhone after iOS 9 upgrade?”
Actually, as iOS 9 came into the market, many iOS 8 users can’t wait to upgrade their iOS device for more convenience and new functions. It’s absolutely right that upgrading OS is a good choice, however, there’s also risk for you to take that the process may fail on the half way and as a result, your data will get lost. And what you need is an iPhone/iPad data recovering tool – iPhone Data Recovery.
You can download it on your computer first, whether you are using Windows or Mac.


Then the passage will be divided into 3 parts to show you 3 modes on retrieving iOS lost data.
- Part 1. Recover Lost Data Directly from Your iOS
- Part 2. Restore Lost Data from iTunes Backup
- Part 3. Retrieve Data Lost for Upgrading Failure from iCloud
Part 1: Recover Lost Data Directly from Your iOS
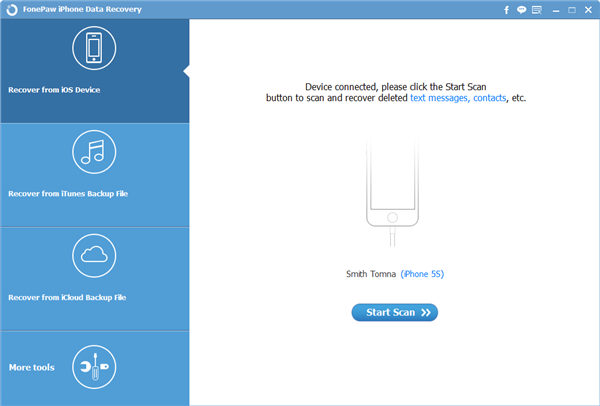
Step 1 Launch iPhone Data Recovery and connect iPhoneDownloaded iPhone Data Recovery on your computer? Launch it. Then, connect iPhone SE/6s/6s Plus/6/6 Plus, iPad Pro/Air 2/Mini 4 to your PC with the USB cable. And click “Start Scan” to begin scanning your lost iPhone data.
Note: Make sure the USB cable is well connected the whole process.
Step 2 Preview and Recover Your iPhone Data
Choose the files you want to recover after previewing that, mark down those you want click “Recover” button on the lower right corner of the interface.
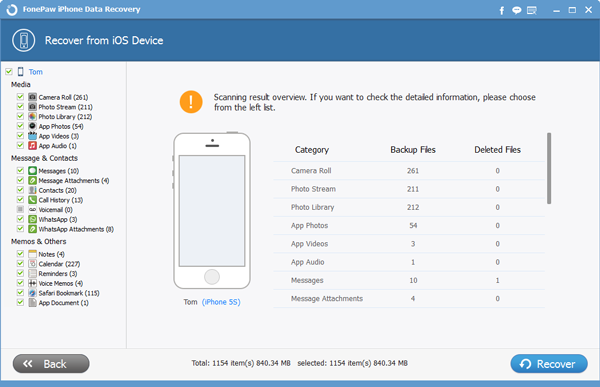
And within few seconds, all your data lost because of failing upgrading to iOS 9 come back to you.
Note: This mode fits you a lot if you didn't back up your iPhone SE/6s/6s Plus/6/6 Plus. If you have backed up your iOS device but don’t have your iPhone/iPad with you, you can choose the second or the third mode mentioned below.
Part 2: Restore Lost Data from iTunes Backup
Step 1 Choose the iTunes Backup File and ScanIf you have done iTune backup before, you will see the backup files listed once you launch iPhone Data Recovery and choose the second mode. If you’ve backed up with more than one device, you can see not only the device name but also the backup date. Choose the backup file you want and click “Start Scan”
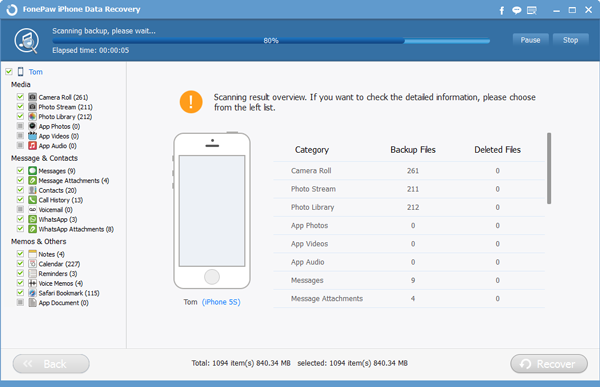
Step 2 Preview and Restore Your iPhone Lost Contents
Few seconds will be taken to scan your iTunes backup files. And you are allowed to preview all the content in backup file. Choose the files you want and click “Recover” to motivate the recovery.
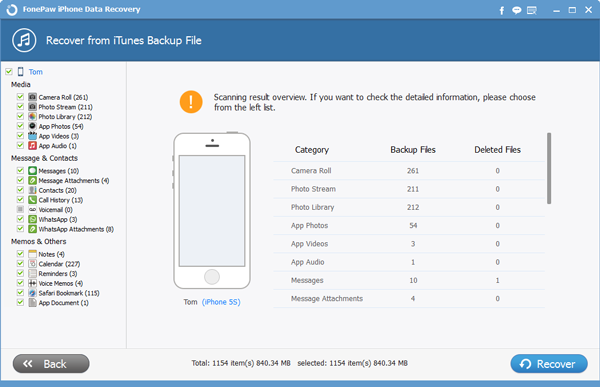
Note: Once you find your data being lost, don't do any backup or sync anything. Just follow what the tutorial above ask you to do. Otherwise, your iTunes backup file will be overwritten and there'll be no way to getting your precious data back.
Part 3: Retrieve Data Lost for Upgrading Failure from iCloud
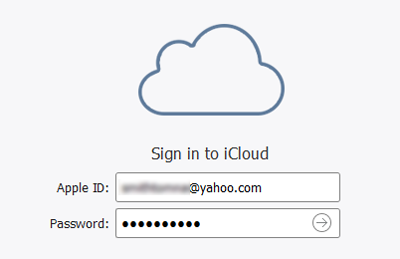
Step 1 Choose the Third Mode and Log on iCloud AccountChoose “Recover from iCloud Backup File” after launching iPhone Data Recovery. Then, sign in your iCloud account.
Step 2 Choose the iCloud Backup File and Download
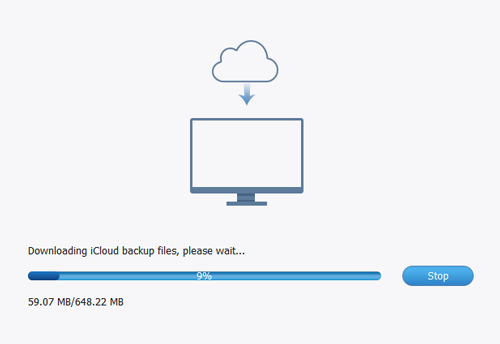
You will see the iCloud backup files that you backed up with this account listed. Choose the one you want to recover and click “Download” to download the backup file.
Step 3 Scan and Regain Your iPhone Lost Data
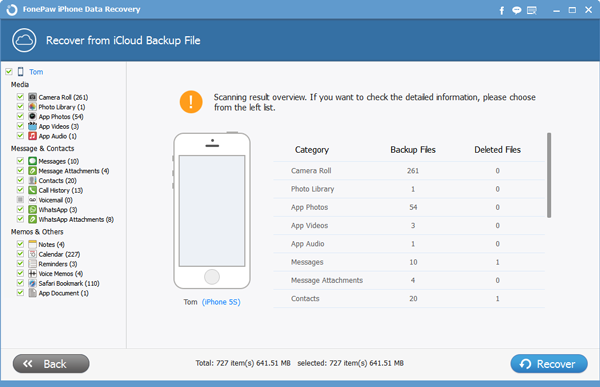
After backup file downloaded, choose “Scan” and all your data will be scanned. Preview them one by one to decide which one to recover.
Done! Download iPhone Data Recovery below to see how well it is to help you restore data lost that caused by iOS 9 upgrading failure. We also suggest you to back up iPhone data regularly and frequently.


