Android Data Recovery
How to Recover Call History on iPhone
-- Thursday, May 09, 2013
iPhone Data Recovery allows you to preview and selectively restore your calls so you'll not have to recover all the records and delete most of the no used numbers all over again. It applies to many versions of iOS devices including iPhone 7/ SE/ 6s/ 6/ 6 Plus and so forth. Here in this essay, I'll show you how iPhone Data Recovery works for your situation.


- Part 1. Retrieve Contact Records from iPhone
- Part 2. Restore Call Logs from iTunes Backup File
- Part 3. Resume Call History via iCloud Backup
- Part 4. Prevent Data Loss on iPhone
Part 1: Retrieve Contact Records from iPhone
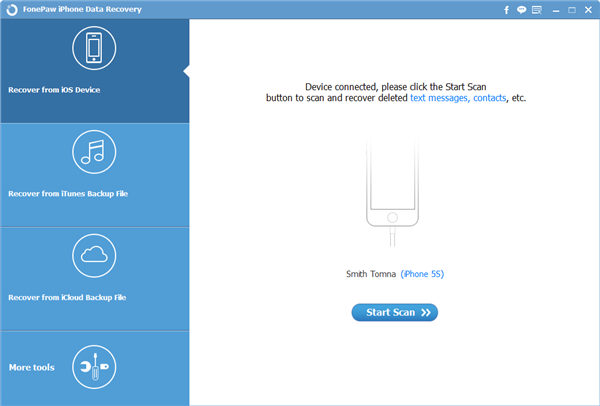
Step 1 Scan your DeviceConnect your iPhone to computer and run the software after installing. When you see a window as below, move the cursor to the first mode and click "Start Scan"
Step 2 Preview & Restore Information
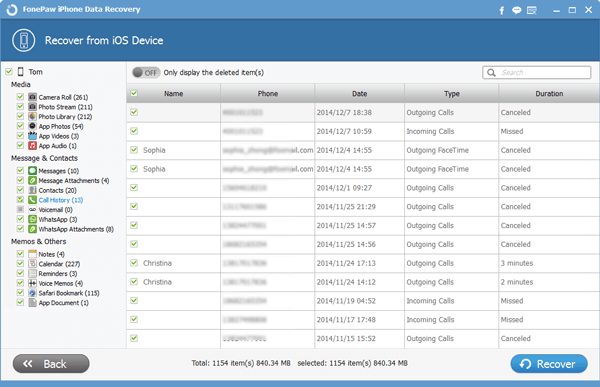
After the scan, the program will display all the recoverable files. You may tick the item named "Call History" on the navigation panel and preview all your deleted information. The "Recover" button will help you get them back.
Part 2: Restore Call Logs from iTunes Backup File
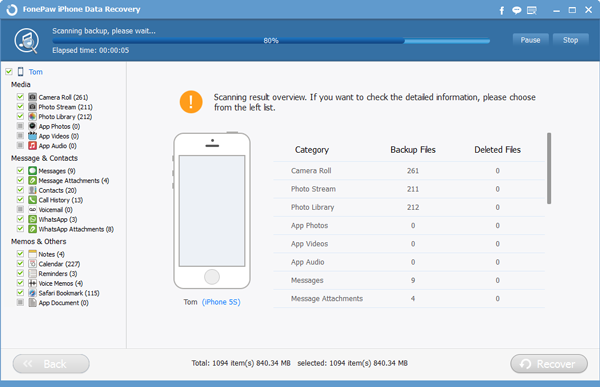
Step 1 Extract iTunes Backup FileMove your cursor to the second mode, choose your latest iTunes backup file and click the icon that says "Star Scan" to extracting the data.
Step 2 Getting Phone Numbers Back
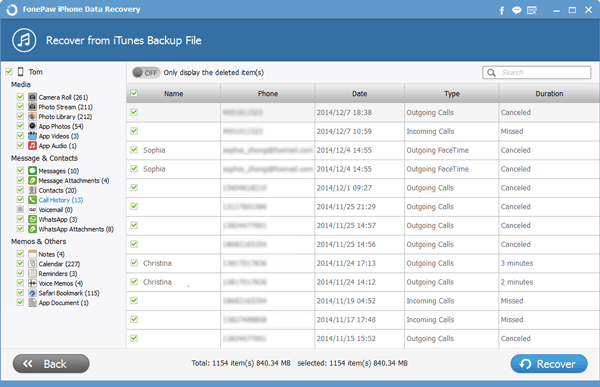
It takes a very short time to scan your iOS device. After that, you can see an interface as below. All the records will be listed on the screen. Please click "Recover" to save them to your PC.
Part 3: Resume Call History via iCloud Backup
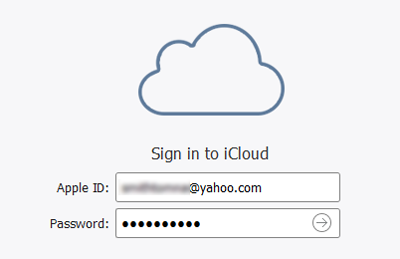
Step 1 Log on iCloud AccountPlease switch to the third mode and sign in your iCloud with Apple ID and password.
Step 2 Scan your iCloud File
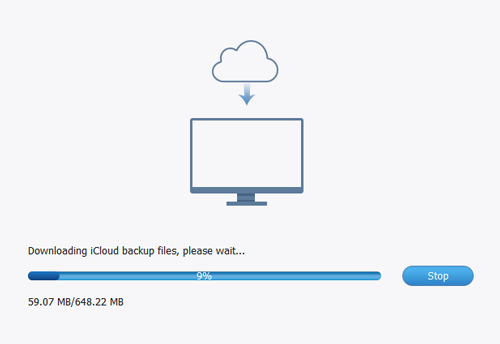
All your iCloud files will be listed in the program's window. Please choose the exact one you want to download.
Step 3 Retreve iPhone Call Log
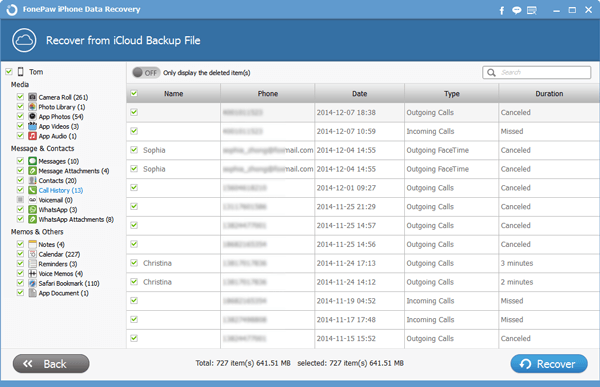
Same way as the previous two parts, preview and tick your wanted call history to display details. After selecting the contents you need, your job is finally done by hitting the "Recover" button.
Part 4: Prevent Data Loss on iPhone
Method 1. Back up with iTunes1. Launch iTunes on your computer and then plug your iOS device into it with the USB cable. After that, go to your device and you would be prompted to trust the computer.
2. iTunes would detect your device. On the interface, you are able to make a backup copy by clicking "Back Up Now" button.

3. Wait for a moment for the process and once the backup finished successfully in iTunes, you can check your backup copy by navigating to "Edit > Preferences > Devices".
Method 2. Back up with iCloud
With iCloud backup, you don’t have to worry about data loss anymore. Please go to "Settings > iCloud > Backup > Back Up Now" and it would start to back up files on your iPhone. But please note that during the backup process, you need to make sure your device is staying connected to your Wi-Fi network.

To check the backup , you can tap "Settings > iCloud > Storage > Manage Storage", then select your device.
iPhone Data Recovery can also restore other lost file types like notes, contacts, music or apps, etc. Give it a try by clicking the below icon. It would only take you few minutes to download and install the program on your computer. But please try not to use your phone after deletion and always remember to back up your iPhone files.


