Android Data Recovery
How to Get More Internal Storage on Android
-- Friday, June 13, 2014
- Method 1. Migrate Data to PC to Save Space on Device
- Method 2. Clear Cache Data of Large Apps
- Method 3. Uninstall Apps That Seldom Used
- Method 4. Move Apps to SD Card
- Method 5. Thoroughly Release Space on Android
Method 1: Migrate Data to PC to Save Space on Device
Even though you have so many files on the Android devices which take up lots of space, you can release those space to get more storage via TunesGo. Just transfer data from Android to PC as backup file and you could save some room to keep other data.


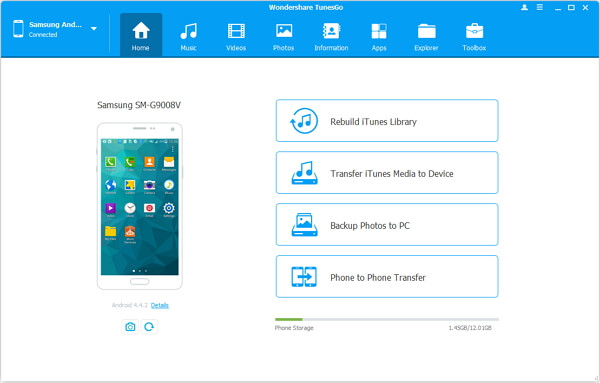
Step 1 Install TunesGo and run it with clicking. When you enter the home screen, connect your Android to PC via USB cable so that you are allowed to tick data types on the left list.
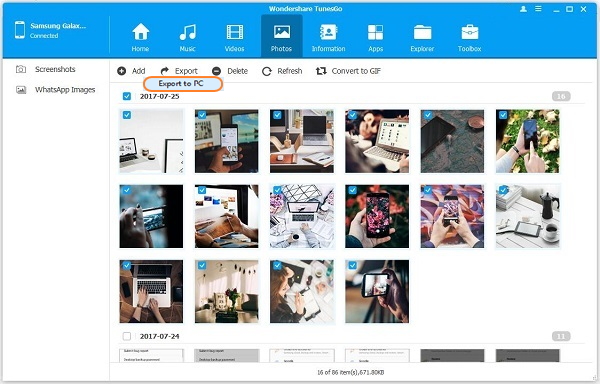
Step 2 Move the mouse to tick the box in front of your ideal items. Next, click "Export" > "Export to PC" to do a backup. At this time, you can delete them on the device to get more storage.
Method 2: Clear Cache Data of Large Apps
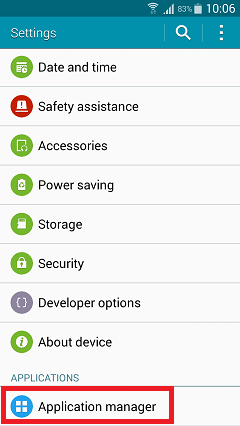
There will generate many cache data when you are using your Android. To wipe the cache data of the large applications that stored in your smartphone, you will find that you get a lot of internal storage space.Step 1 Operate: “Settings” > “Application Manager”.
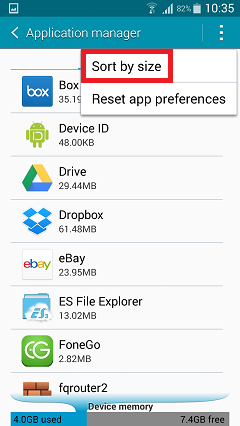
Step 2 Tap the three vertical dots to choose “Sort by Size” and you will see that the largest file will be listed at the first place. “Settings” > “Application” > “Application Manager” > “Dots” > “Sort by Size”.
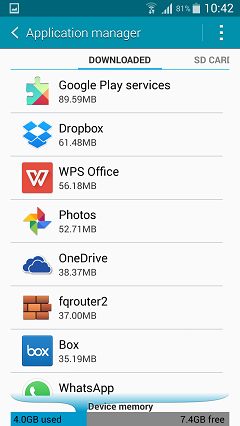
Step 3 Some cache file of the apps are several MB, such as Google, Maps, Market, browser and other files. Clear cache of them and your internal space will be expanded.
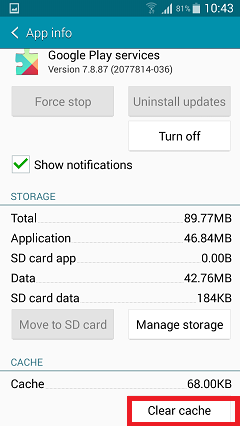
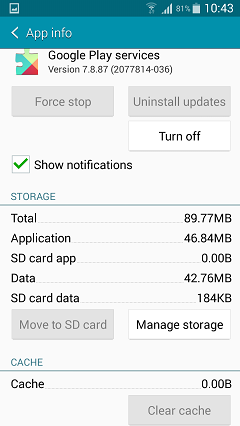
Note: Google Play Store also offers you some apps that can automatically wipe your cache file, such as Quick App Clean Cache. If you have rooted your Android before, you can download CacheCleaner and CacheMate ,etc. on the Google Play Store to clear cache files quickly and conveniently.
Method 3: Uninstall Apps That Seldom Used
Another useful way to clear cache to get more internal space is to uninstall the data that you seldom use. It can not only save your Android internal space but also save battery power of Android phone.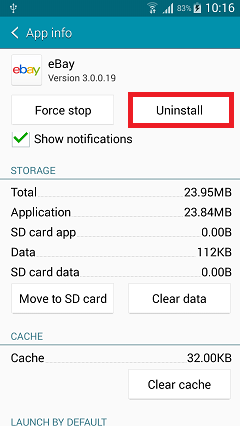
Method 4: Move Apps to SD Card
Insert an external SD card into the phone, and transfer the Android apps that are movable to the SD card. If you haven’t root your Android yet, you can root your Android first and get the file manager app on your Samsung Galaxy to move the pre-install app to the SD card or delete them if you don’t like. Or you can directly download and install Apps in SD card.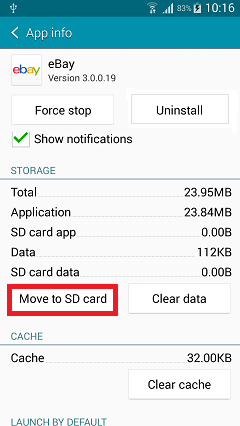
Method 5: Thoroughly Release Space on Android
If you think all the above methods still cannot satisfy your need and want to release more storage on Samsung Galaxy S7, LG G4, Nexus 6, HTC M10 ,etc. you can turn to Secure Eraser. Read on and check how it works.ATTENTION: The software will DELETE ALL DATA stored on your device and give a brand new phone back to you. Suggest you to back up phone data before using it.
Download and install the software on your Windows/Mac.


Step 1 Run the program after installation and connect your Android device to it via USB cable. Don't forget to enable USB debugging so that the software can soon detect and recognize the plug-in device.
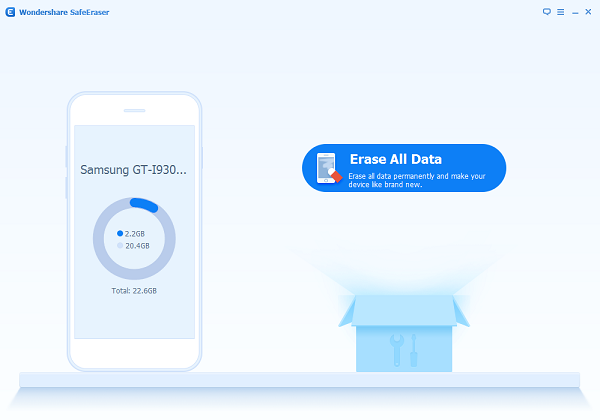
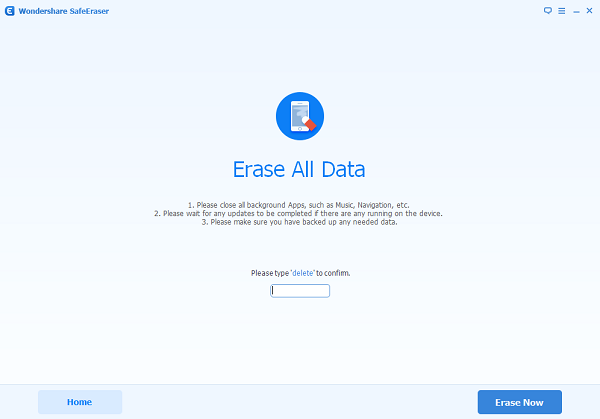
Step 2 When your phone is well connected, you will see the interface as below. Click the "Erase All Data" option, type in "delete" in the box to confirm it and hit "Erase Now" at the lower-right corner, then, the software will start deleting present data stored on your phone and releasing phone storage.
Step 3 The software is now freeing up space on your phone as the interface shown below. Also you can "Stop" it if you want to end the process.
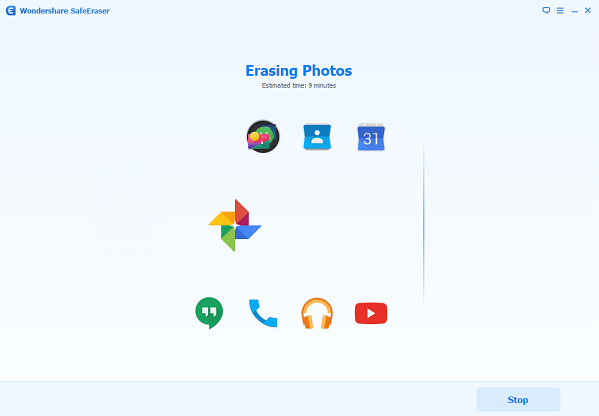
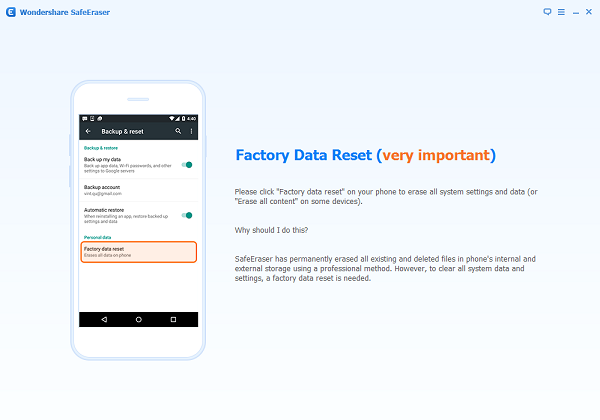
When the process completed, you should perform a factory reset to your device to thoroughly release maximum space on your Android phone.
That’s it! It is helpful isn’t it? You will find that it goes smooth when you using your Samsung Galaxy S7. For more tips to use Android phones, you are welcomed to our website and you will find a lot of Android tips and tricks.


