Android Data Recovery
Flash Stock Rom on Galaxy S7/S6/S5 via Odin3
-- Monday, June 06, 2016
Step 1 Download Odin3 and the Flashing Package
Check out specific information of the Samsung phone (navigate to "About device">"Device name", "Model number", "Android version " and "Build number ".)
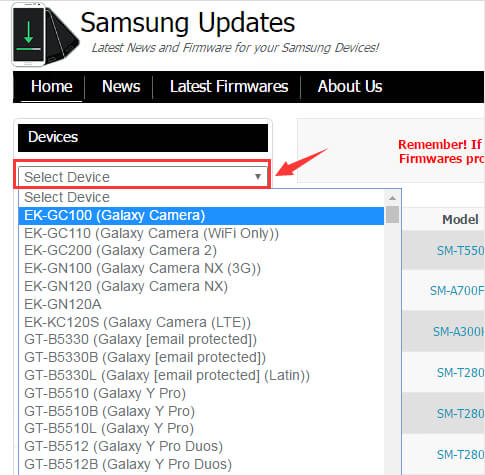
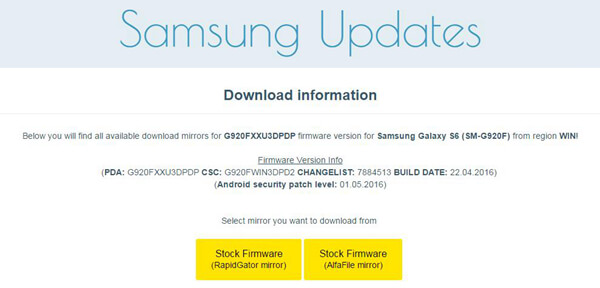
Now, head to Samsung-updates to download Odin3 and flashing package compatible to your Samsung device. When finish downloading the file, please unzip the file.


Step 2 Boot Your Samsung into Download Mode
Turn off your Samsung phone.
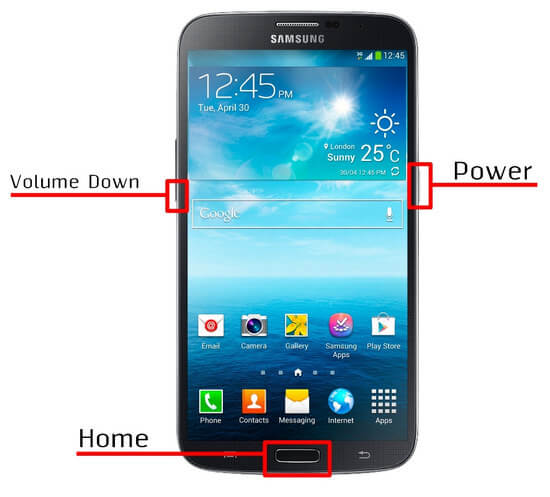
Press down Power Key, Home Key and Volume Down Key at the same time for seconds.
After that, the screen will show as below. Now, please the Volume Up Key to continue and enter Download Mode.

Step 3 Run Odin3 and Connect Samsung to PC
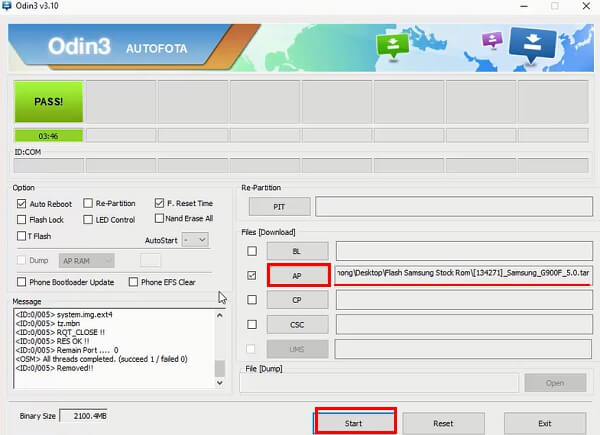
Open Odin3 and connect the Samsung device to PC via USB cable. Odin3 will automatically scan and recognize your device and prompt "Added" message in the log.
You now need to click on "AP/PDA" button and choose the file extracted in advanced. Get it started by click "Start" button, and wait for a while until it finishes the flashing process.

Note that you'd better not remove or use your Samsung handsets until flashing is finished or fails.
You are able to know the process being done by a green "PASS" on the left, and your Samsung will automatically restart.
Ways to Address Failures When Flashing
Sometimes it happens that the flashing fails, so what should you do in such case? Try the following solutions and see whether it works.
1.Restart your Samsung handset.
2.Reboot computer and install the latest Samsung USB Driver, and then try to connect again.
3.Download the latest version of Orin, and run Odin3 as Administrator.
Get Samsung flashed step by step. You will find it just a piece of cake. You are welcome to contact us if you still have questions. Have a try then.


