Android Data Recovery
How to Enable Developer Options on Android
-- Wednesday, January 14, 2015
In fact, Android 4.2 onward tills the latest lollipop the developer options are hidden by default. Here we would talk in detail about how to enable USB debugging by making developer options appear on your Android smartphones, tablets and other devices.
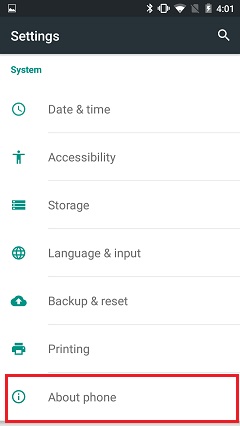
1. Go to Setting menu and scroll down to About device (or About phone) then tap on it.

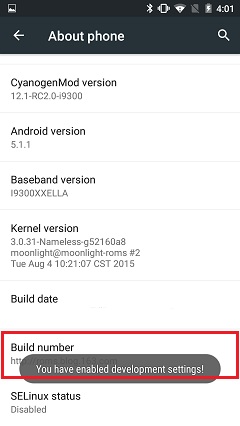
2. Scroll down to the bottom again, where you could see Build number (Don't worry if your build number are different from ours here). Tap it 7 times to become developer.

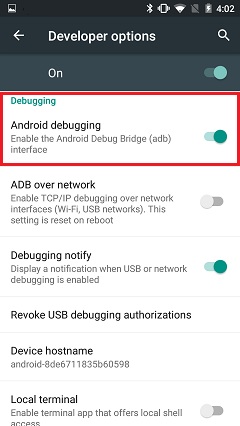
3. Go back to Settings, you should be able to see Developer options item in your setting list now. Tap it to enable USB debugging mode on your Android device. If you want to make the option invisible again, tap on the on/off toggle at the upper right.

Note: Google won't hide the development options for no reason. If you don't know much about the other options on the menu, leave it alone; fiddle with the settings can really make bad things happen.
For more tips and tricks on Android, please visit our Android Tips column. Feel free to leave any question you have about Android devices on the comment section below.


