Android Data Recovery
GIF Maker:DIY Dynamic Pictures on Samsung
-- Friday, November 25, 2016
This article will talk about how to create GIF easily in part 1. And you will find out how to manage your GIF images like the way to edit GIF and transfer it to device in part 2. In part 3, it will show you how to recover lost GIF images on your device. Please continue to read.
- Part 1. How to Create GIF with TunesGo
- Part 2. How to Manage Your GIF Images
- Part 3. How to Recover GIF Images on Device
Part 1: How to Create GIF with TunesGo
You are able to use the photos or videos from your device to DIY dynamic pictures in a very simple way the help of TunesGo. Please download the program by clicking the download button below to have a try.Note: This program allows you to select the photos and videos from your device, but it would save the GIF on your computer instead of your device.


Step 1 Launch the Program and Connect Device to PC
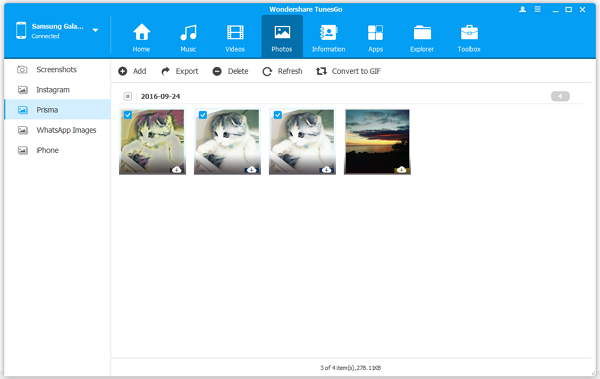
After you download and install the program, please launch it on your computer. Then plug your Android device into computer with the USB cable that comes together. Now, you need to go the device and enable USB Debugging. Then click "Photos" button from the main menu on the top of the interface.
Step 2 Choose the Photos or Video From Samsung
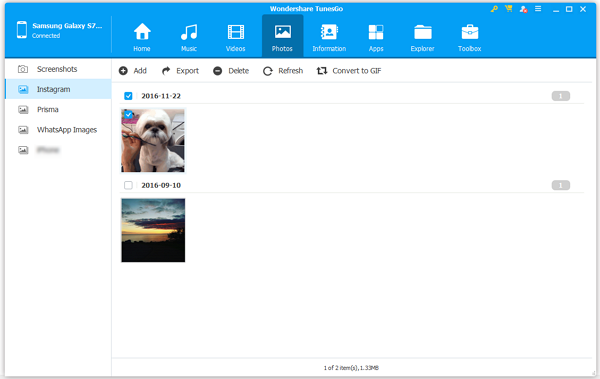
On the left pane from the interface of "Photos" option, you can see the files of photo/video are detected and displayed, which you can select the ones you want to create the GIF image. Then please click "Convert to GIF".
Step 3 Click "Create GIF" Button to DIY Dynamic Pictures
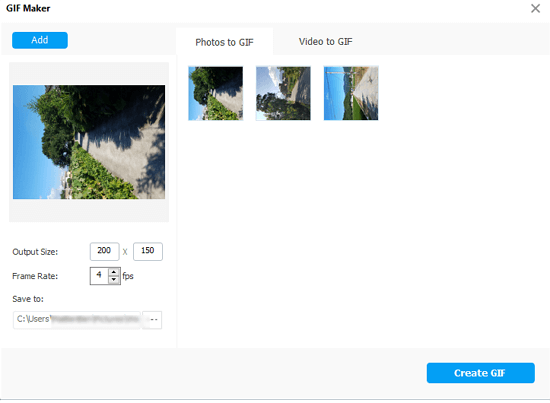
Before you decide to create the GIF, you are able to preview it by clicking the thumbnail beneath the "Add" button. If it is good enough for you, you can now click the "Create GIF" button.
Part 2: How to Manage Your GIF Images
Once you DIY your GIF images, you may need to add text on it, resize it, crop it and so on. For example, now you want to send a GIF image to your friend via the social App, if you want to make it closer into your life, you may want to add text of something about your friend to make it more interesting. Actually, it is pretty simple to do it. You are able to edit your own GIF on the Internet and you don't even need to download any software on your computer. So why not have a try and make your dynamic pictures just like the way you want?After you create the GIF with TunesGo and edit it (if you need to) on your computer, you can transfer it to your device.
Step 1 Connect Device to PC
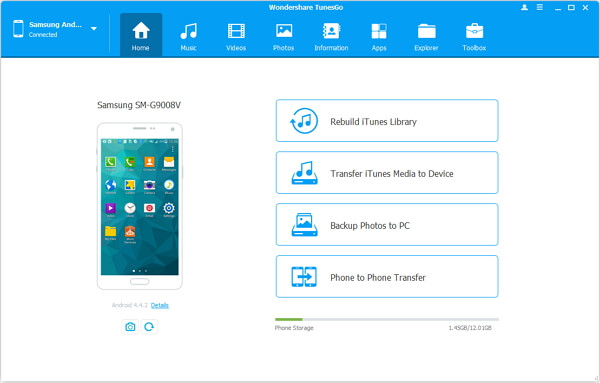
Please plug your Android into computer with the USB cable and enable the USB debugging on your device. Once it is detected, you can see the interface below.
Step 2 Transfer GIF From PC to Device
As the GIF you created with TunesGo would be saved on your computer, so you may want to transfer it to your device. On the interface, please click "Photos" on the main menu. You can see the different photo files on the left pane. You can choose the location to import GIF. For instance, if you want the GIF to be transferred to "Instagram", please click "Instagram > Add > Add File".
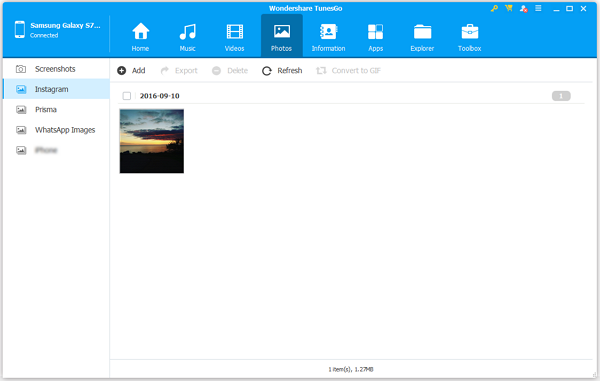
And you are able to choose the GIF from computer to your Android. After that, you can see the GIF you just imported on the file item.
Tips: You are able to add the GIF to Android with Android Transfer as well, which has the similar steps with Tunes. You can also download it and have a try!


Then connect your Android and click "Photos > Add > Add File". After that, just choose the GIF images to transfer to device.
Part 3: How to Recover GIF Images on Device
Sometime the GIF images may be deleted by accident, or your device gets damaged and the data are all gone. Now if you want to get them back on your device, you can try Android Data Recovery, which allows you to recover deleted data like photos (including GIF images), contacts, messages, call history and videos easily. What you need you do is to download the program and have several Clicks.Note: If you realize that you accidentally delete the data, please stop using your device to prevent from data loss.
If you have any questions, please feel free to drop us a comment below!


