Android Data Recovery
How to Backup and Restore Viber Chat History on Android
-- Thursday, March 28, 2019
- Part 1. Backup and Restore Viber Chat History via E-mail
- Part 2. Backup/Restore Viber Locally on Android
- Part 3. Viber Chat Backup and Restore via Android Data Recovery
- Part 4. Tip for iOS User: Backup Viber on iPhone
Part 1: Backup and Restore Viber Chat History via E-mail
Do a Backup For Viber with E-mail
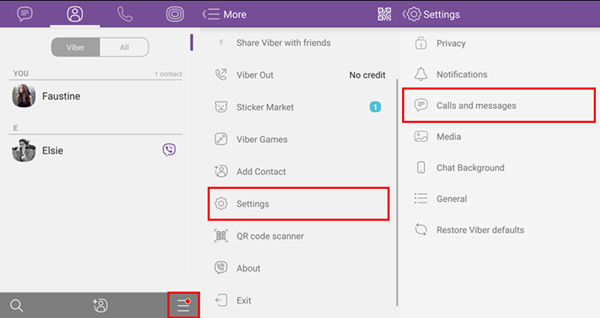
Step 1 Set to Send Viber Chat HistoryTurn on Viber app on your Android phone and sign in your account. Tap the More button (three-bar) icon. Then scroll down to choose "Settings" and select "Calls and messages".
Step 2 Select email Provider
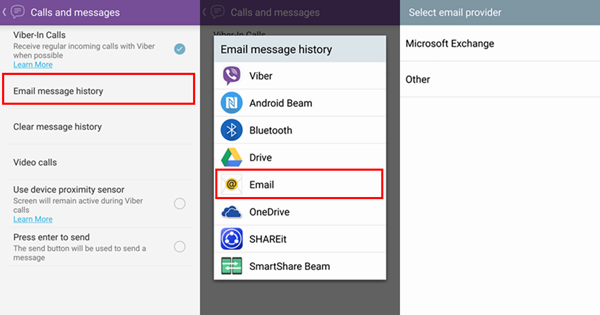
In the page "Calls and messages", hit the option "Email message history". Then you can choose an app to email message history. Here we will choose "Email". Next, you can choose Microsoft Exchange or Other email apps.
Step 3 Send Viber Chat History
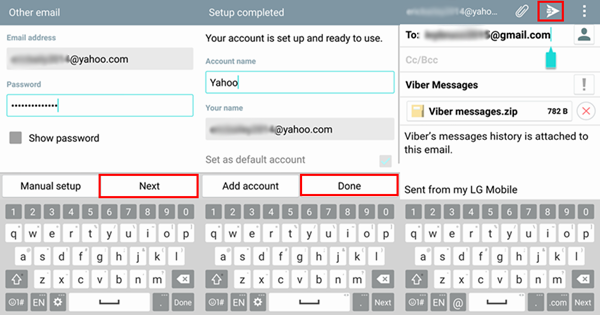
Before backup, you need to set up an email account. Enter the email address and the password of it. Then choose "Next". Make sure your phone is online so that it can connect to the server. When your account is set up and ready to use, choose "Done". In the next screen, enter the email address to receive your backup. Then hit the arrow icon at the upper-right corner. Your Viber chat history will be sent to that email address.
Restore Chat History via E-mail
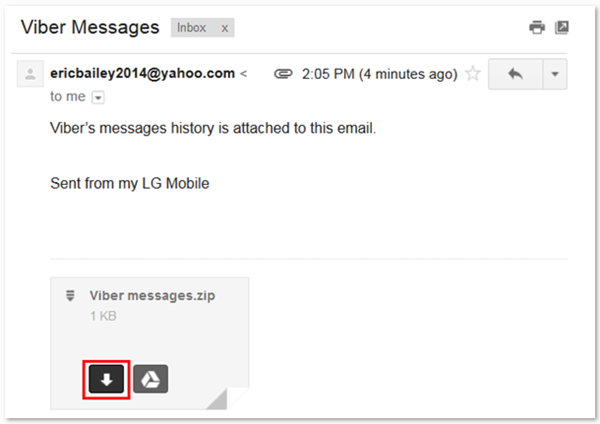
Step 1 Download Viber Messages from EmailSign into the email account you use to receive backup. Find the letter from your Android phone. There should be an attachment named "Viber messages.zip" in the letter. Click the "Download" icon to download the backup.
Step 2 Restore Viber Chat History on Android
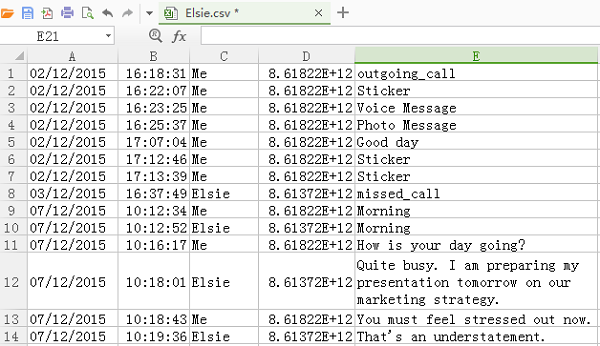
Open the CSV file which is named according to the contact's name. You can view you chat history. They are orderly listed according to sent and received time. And both sender and receiver are shown.
Part 2: Backup/Restore Viber Locally on Android
Step 1 When you log in Viber successfully, you can talk with friends freely. There is a logo with three lines beside "Viber" on the top side. Tap it and scroll down for "Settings" so that you are allowed to choose "Viber Backup".Step 2 If you have not selected the Google account before, it will ask you to add/choose Gmail with tapping "Settings" to go on because the backup data is saved on Google Drive actually.
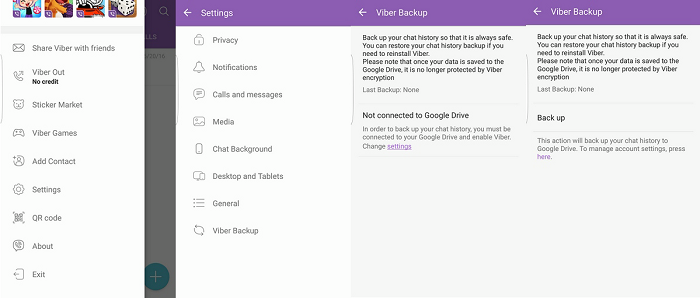
Once you tend to restore the data, in the backup screen, there is an option to let you restore the viber conversation.
Part 3: Viber Chat Backup and Restore via Android Data Recovery
To backup and restore in an effective way, Android Data Recovery would play vital role in such case.Step 1 Connect Phone to Computer to Back Up
There is no doubt that to get the program is the most important thing you should do. Next, use the USB cable to get the device and PC connected as well as allowing debugging as what the interface shows. Go forward "More tools" to back up and restore.


Step 2 Choose Data Type to Save
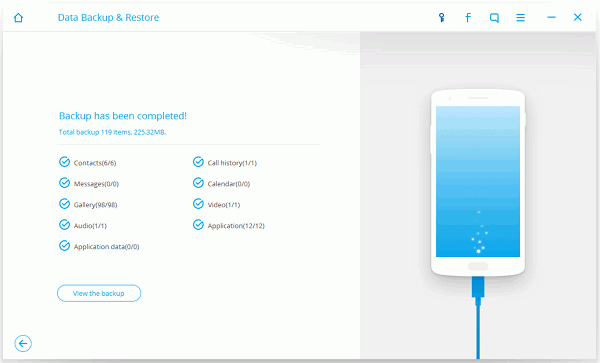
What you should do next is to select "Viber" on the "Application data" to go on saving process. The process on the screen can inform you which data is completed in copying.
Step 3 View the Files
There is a button named "View the backup" on the window, so please click it to preview the data. After you are sure the backup is done, you are allowed to restore the viber chat.
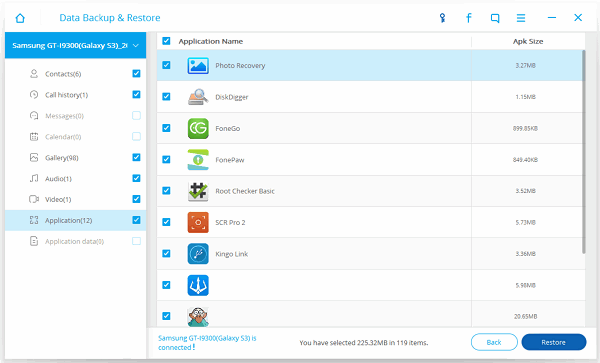
When you need to restore certain backup data, just hit the "Restore" button to retrieve viber conversation to the Android phone.
Is it easy? Note that you cannot view image or stickers in the CSV file. You'd better download it once you receive it.
Tip for iOS User: Backup Viber on iPhone
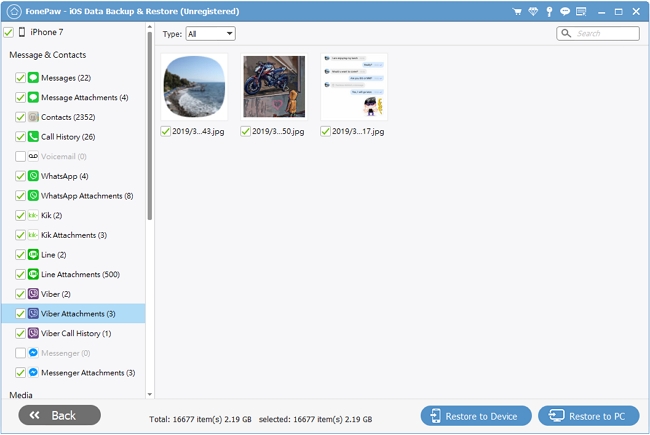
For iOS users, no matter whether you have backup or no backup, you're able to recover the Viber data back with iPhone Data Recovery but the safe way is to back up data regularly, which can avoid lots of troubles. Thus, please start your backup now.1. Launch iPhone Data Recovery and move to iOS Data Backup & Restore feature.
2. Select data types to back up. You can back up all or just do a backup for Viber messages and media files.
3. After backing up, you will check the size of the backup and then preview the backup details.
