Android Data Recovery
How to Backup Files to Amazon S3
-- Wednesday, May 11, 2016
Backup Files to Amazon S3
Step 1 Sign up/into Amazon Web ServiceTo sign up, go to http://aws.amazon.com/. Then select "Create a Free Account". Enter your e-mail or mobile number in the blank. Then select "I am a new user". Then click "Sign in using our secure server". After that, fill in your contact info, payment info, identity verification, support plan, confirmation by following the instruction.

Step 2 Open AWS Management Console
Once signed up, click "Launch Management Console" at the right. Then you will be taken into the log-in page. Enter your email address and select "I am a returning user and my password is". After that, enter your password and click the "Sign in using our secure server".

Step 3 Open the Dashboard
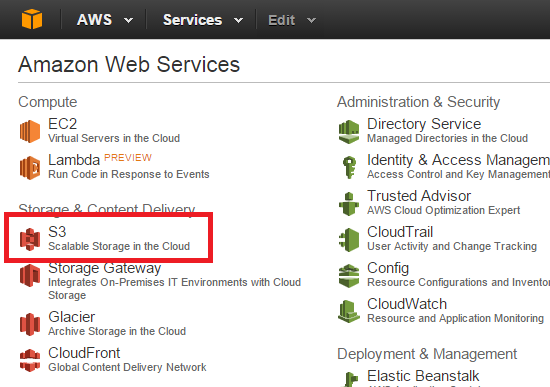
In the AWS center, locate "Storage & Content Delivery". Select and double click "S3" to open the dashboard.

Step 4 Create a Bucket
You are in the S3 dashboard. Click the "Create Bucket" button at the upper left corner. Then create a bucket by selecting a bucket name and region. After that, click the "Create" button.
Note: there are a number of restrictions on S3 bucket names; you can see the full list here.

A bucket is a container for object stored in Amazon S3. When creating a bucket, you can choose a Region to optimize for latency, minimize costs, or address regulatory requirements. For more information regarding bucket naming conventions, please visit the Amazon S3 documentation.
Step 5 Backup Files to Amazon S3
Select your newly created bucket, which is named "xx-back-bucket". Then click the Upload button.

Click Add Files and select a file to backup. Then check the "Start Upload" button to begin backing up. Then progress bar on the right column will show the upload status.

Now that you have backed up your files into Amazon S3, you can reach your files and the retrieve any amount of data at any time, from anywhere on the web.


