Android Data Recovery
How to Back Up and Archive Facebook Messages
-- Monday, November 30, 2015
- Part 1. Directly Back Up and Archrive on Website
- Part 2. Back Up and Archive Facebook Messages on Android
Part 1: Directly Recover Deleted Facebook Messenges from Android
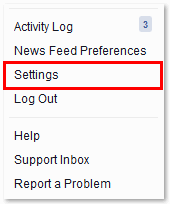
Step 1 Go to SettingsSign in your Facebook account on a computer. Then click the triangle icon at the upper-right corner and choose "Settings".
Step 2 Download a Copy
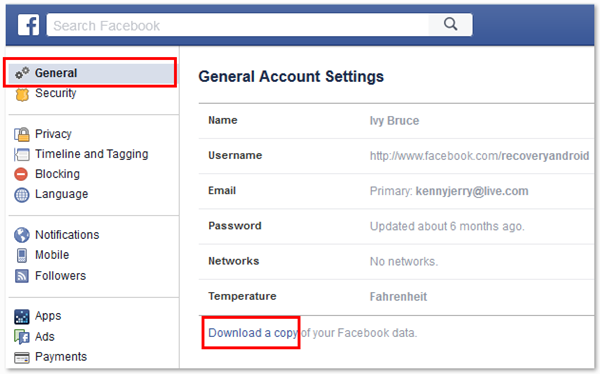
Choose "General". Then you can edit general account settings. Click "Download a copy" as the screenshot shows.
Step 3 Start your Archive
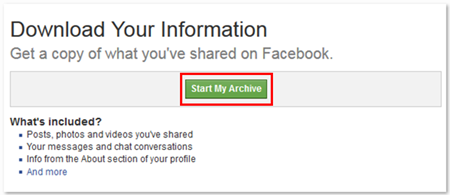
Get a copy of what you have shared on Facebook by click the green button "Start My Archive". You can archive files including messages and more.
Step 4 Re-enter your Password
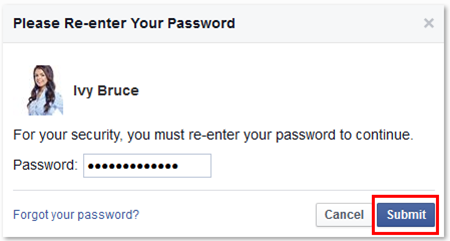
There should be a pop-up note. For your security, you must re-enter your password to continue. Then click the button "Submit".
Step 5 Gather and Email your Info
Choose "Start My Archive". It may take a little while for Facebook to gather your photos, wall posts, messages, and other information. It will then ask you to verify your identity in order to help protect the security of your account.
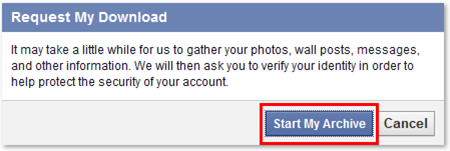
Last, click the button "Okay". Facebook will collect your info and will send an email to your email inbox when it is ready for download.

Part 2:Back Up and Archive Facebook Messages on Android
How to Back Up Facebook Messenger on Android
For backing up the chat via Messenger, Android Data Recovery offers great help in fixing this case. No matter which device you are using, just with one click, data can be saved and even restored if you need.Step 1 Launch Android Data Recovery on PC
Get into the download page on the website or click the button as following so that you can gain the program on the computer and double click to use. Then get the Android and PC connected via cable. If the screen asks you to enable debugging, follow it and continue.


Step 2 Do a Backup for the Phone
When you meet with the interface as below, it will guide you to click "Backup" and the "Restore" button does not allow you to hit if it is the first time that you make a backup .
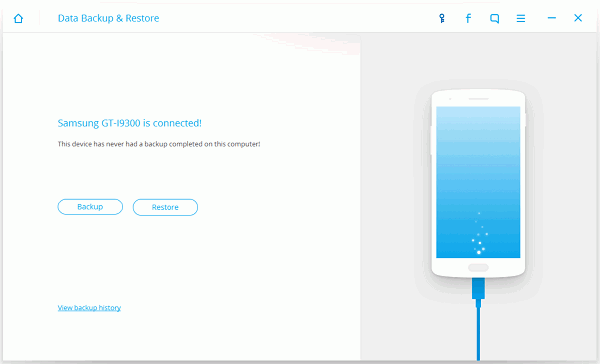
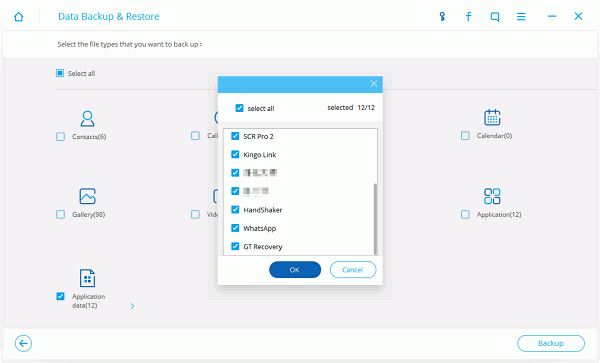
Step 3 Choose Facebook Data to Save
As for your need, you may tend to back up Facebook Messenger data only, just tick the arrow beside the "Application data" button and select "Messenger".
Step 4 Wait and Preview the Backup
After a few minutes, the backup is done and you can have a preview on the history. The backup file actually is saved as .bak format but it can be viewed via this smart software so that you can make sure whether it is what you need to go on restoring.
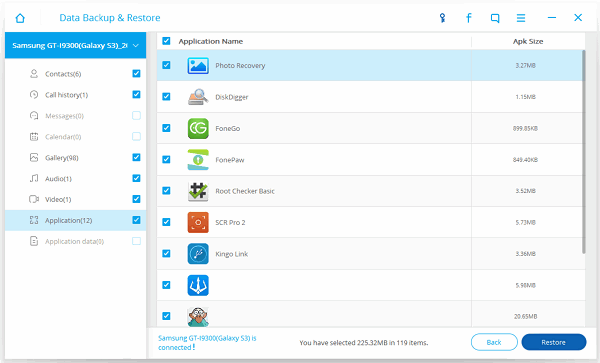
How to Archive the Messages on Device
Step 1 Sign in Facebook Messenger AppConnect your Android phone to Wi-Fi or turn on cellular. Then sign in your Facebook on Messenger app.
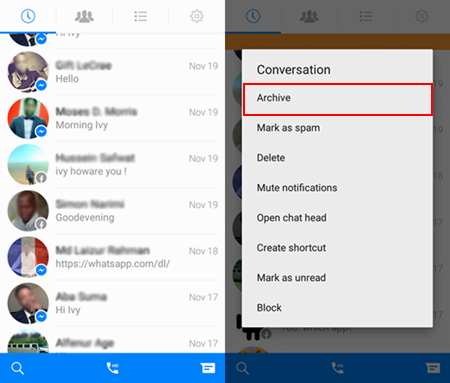
Step 2 Archive Conversations on Android
Go to recent conversation list. Scroll down and choose a contact. Long tap the contact. Then choose "Archive" in the pop-up note. Conversation selected will be archived.
That's all! It is easy to backup and archive Facebook messages on Android and website. Keep your backup so that you can recover your messages if they are lost.


