Android Data Recovery
How to Backup Android Contacts to Gmail
-- Thursday, July 03, 2014
For the solution, you will learn how to back up Android contacts on Gmail in part 1. And in part 2, you can choose the best alternative method when there are other issues and you could not get back contacts from your Google account.
Part 1. Sync Android Contacts to Gmail
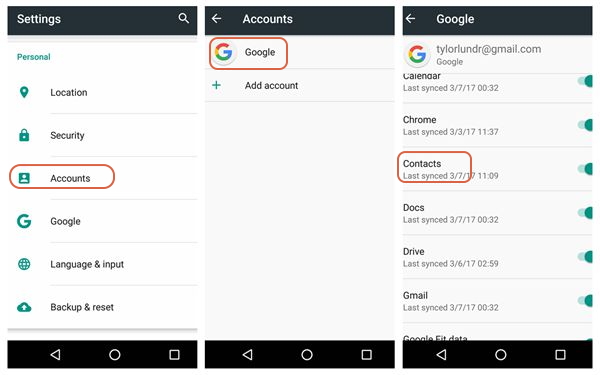
Before we start, make sure you have created an account and signed in. We are going to take Nexus 5 (Android 6.0.1) as an example.Step 1 To auto-sync contacts from your Android, please firstly go to your device and tap "Settings" app on the screen.
Step 2 In the interface of Settings, please navigate to "Account>Google Account>Contacts" and it would automatically sync your contracts on Android to Google account.

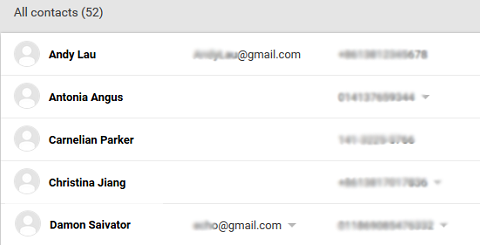
Step 3 Go to your Gmail account on your computer. You can see that all your device contacts have been backed up to Gmail.

Note: Different devices may be a little different to operate. For instance, for some Android phone, you can also go to "Contacts app>Settings>Turn on contacts sync" to back up your contacts.
Part 2. Back Up Contacts with Android Data Recovery
When you delete contacts on your Android, the ones you deleted would be lost on your Google account if you enable the auto-sync contacts. In other word, the contacts show the same list as what you can see on your Android. And the way in part 1 to back up data may fit the situation that you want to retrieve data when you lose you device. But if you accidentally delete you contacts on Android, it could not help.To solve this problem, please try the Android Backup Restore app, which allows you to make a backup copy on your computer in one-click.
Step 1 Download Android Backup Restore
First of all, please download and install the program on your computer by clicking the following buttons.


Step 2 Plug Android into PC
Launch the program and plug your Android into computer. Then go to "Data Backup & Restore" pane and please follow the guide on the interface to enable the USB debugging on your device.

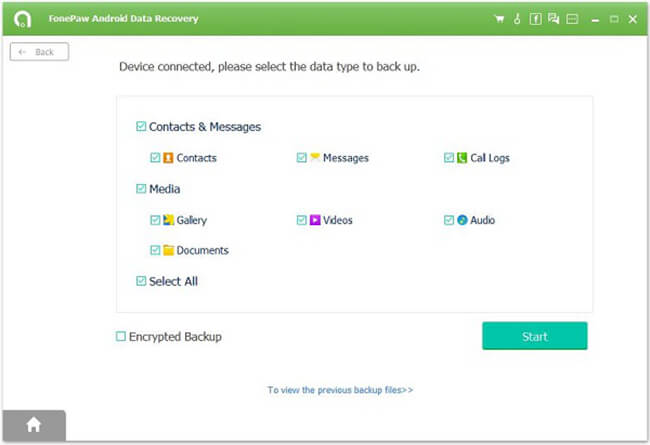
Step 3 Choose "Contacts" Option
After it is detected successfully, please click on the "Backup" option. Now, you can see there are different data types displayed on the interface. Please choose "Contacts".

Step 4 Back up Data
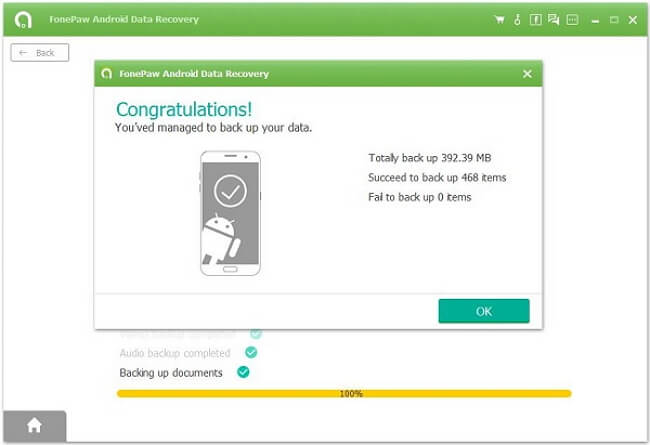
Click on the "Backup" button on the lower-left corner and the program would start to back up the contacts for you. After the process completes, you can click on the "View the backup" to check it on your computer.

Actually, the above program we recommend can also recover the deleted data including the contacts directly with the backup copy. So why not download it on your computer and have a try yourself? Any questions please drop us a comment below.


