Android Data Recovery
User Guide: How to Use Android Photo Recovery
-- Tuesday, March 12, 2013
Android Photo Recovery is an excellent recovery tool that you can hardly wait to introduce this Android photo recovery tool to your friend who has faced the same problem with you. It provides you a simplest way to recover your Android data no matter you use Samsung, HTC, Motorola, LG, Sony, and so on. What you need is to have an USB cable and have your Android phone with you.
Now, you can download the trial version of Android Photo Recovery on your computer for free and then read the bellowing steps.


After downloading Android Photo Recovery on your computer, you can launch it by double-click the icon. Then, let's start the amazing adventure of recovering Android data on your own.
Ways to Recover Pictures on Android with Android Photo Recovery
Step 1 Stop Update Your Android Data Once Have Precious Data LostOnce your Android data got lost, you should stop update anything at once. Otherwise, your backup file will be overwritten because of your update and what you deleted accidentally can not be extracted back any longer.
Step 2 Connect your Beloved Android to the Computer
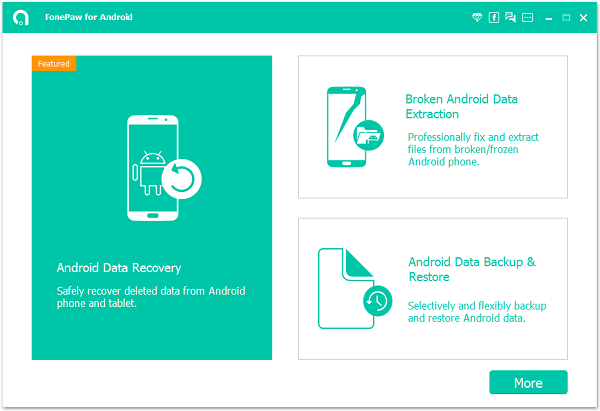
After installing Android Photo Recovery on your computer, launch it and you will see the interface as below. Then, connect your Android phone to the computer. After the program has scanned and detected out your device, you can move on to the next step.
Step 3 Enable USB Debugging on your Android
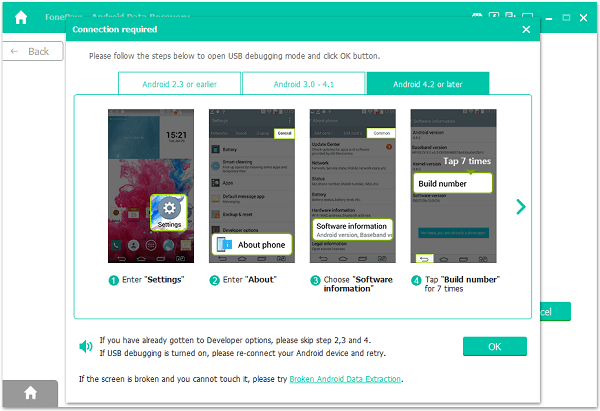
If you haven't enable USB debugging on your Android, you will be required to enable it first. If you have enabled that, you can just neglect it. Choose the correct way to enable USB cable according to your operating system version.
1) For Android 4.2 or newer: Enter "Settings > About Phone > Build number" for several times until you get a note saying that "You are under developer mode". Then, go back to "Settings > Developer options > USB debugging".
2) For Android 3.0 to 4.1: Enter "Settings > Developer option > USB debugging"
3) For Android 2.3 or earlier: Enter "Settings > Applications > Development > USB debugging".
Step 4 Scan your Android and Select Data Item
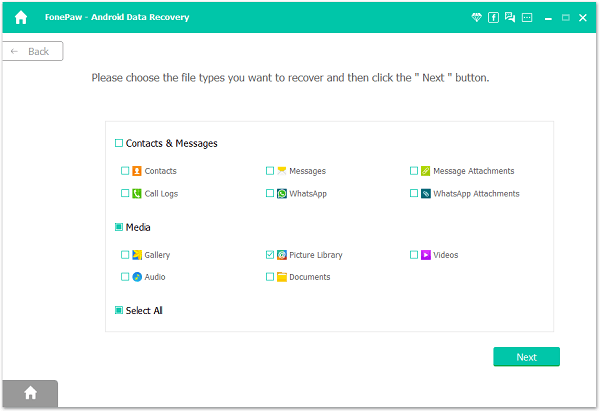
After that, your device will be connected and the software will begin analyzing your Android phone for lost data when you see the window below.
In the latest version of Android Data Recovery, you are empowered to seletively choose which type of files to be scanned.
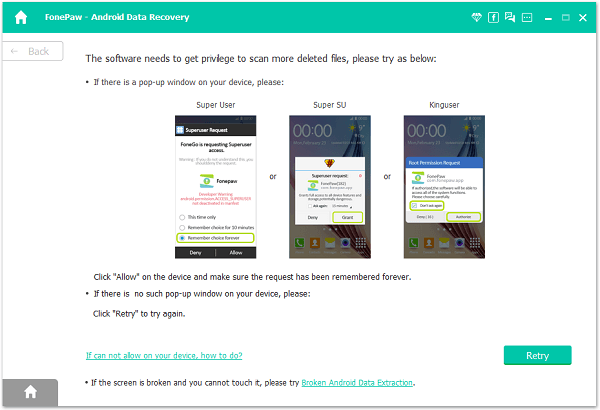
Then, the program will ask you to turn to your device. Click "Allow" on the screen to let the program scan your device.
Step 5 Preview and Recover Photo from Android
When the scanning progress ends, all your Android data will be scanned out and listed in the interface, you can preview them all one by one. As you previewing, you can mark down those photos, contacts, movies, text messages, and so on, that you want to get back. After previewing and choosing all what you want, you can simply click "Recover" on the lower-right corner of the program. After a few seconds, all your lost Android data will be extracted and saved on your computer.
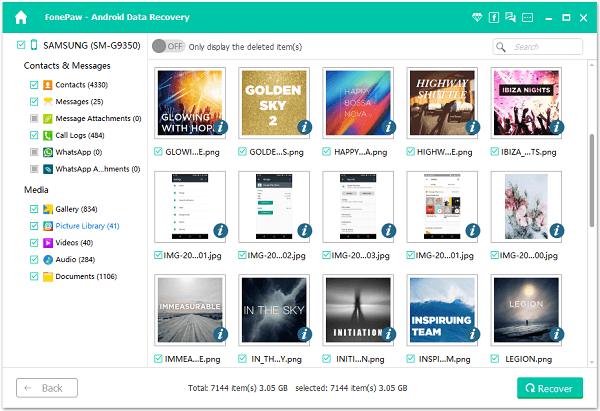
Note: To make sure not to miss any Android data, you should make sure not to sync anything as long as you find your data has lost. Because, once you sync anything and do backup, the backup file will be overwritten and the previous data would go forever. Besides, to import those recovered data back to you, you can use Android Transfer which is another excellent tool that can help you transfer and import contacts, messages, photos, videos, apps, and so forth.
Step 6 Do Backup of Your Android Device to Protect the Files
Backup your Android data anytime you update new data. Keep the backup file updated so that you don't need to worry that Android data can't be restore.
As you can see after reading this tutorial, the recovery process is so easy that you need only 4 steps: Connect your phone, enter DFU mode, analyze and scan, preview and recover, to recover your Android lost data including photos, videos, text messages, contacts and something like that.
Why not download Android Photo Recovery with the button below to help yourself recover Android missing photos, etc..


