Android Data Recovery
Fix Corrupted SD Card without Losing Files
-- Monday, October 16, 2017
People also read:
- Part 1: Fix Corrupted SD Card Using Chkdsk
- Part 2: Recover Lost Data from SD Card
Part 1: Fix Corrupted SD Card Using Chkdsk
In this part, you will see the guide to fix corrupted SD card and prevent any more corruption from happening. In addition, you may be lucky enough to retrieve some files on the corrupted SD card(But please don't worry about the lost data, you see a guide to get them back in part 2).Step 1 Enter "cmd" in a search bar of the start menu and you can see the "Command Prompt" displayed. Right-click and choose "Run as Administrator" and you will see an Administrator Command Prompt pops up.
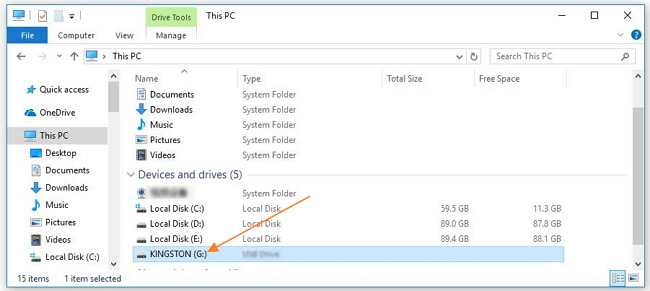
Step 2 Insert your SD card correctly into computer and go to "My computer/This PC" and check for the driver letter. In this case, the driver letter is "G".

Step 3 Type "chkdsk g: /f" on the command prompt(not all of your driver letter displayed as "g", so make sure that you type in your specific one).

Step 4 Hit enter and the program would start to fix corruption on the SD card. Please wait patiently for the process. After that, you can access your SD card and check if it is fixed or not.
Part 2: Recover Lost Data from SD Card
Here you are recommended to use Data Recovery program to recover lost data from SD card. Or in other cases, you can access your corrupted SD card and get the data back on your computer even though it is not successfully fixed. Data Recovery program is a powerful tool that will help users recover deleted or lost data from corrupted SD card. Please check for the following guide to see how it works.Step 1 Download and Install Data Recovery
Please download and install Data Recovery program on your computer and launch it. Then plug your SD card into computer and the program will detect it.


Step 2 Select Data Types You Want to Recover
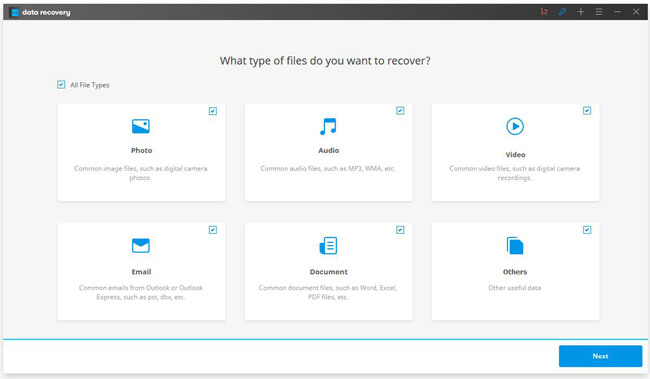
You are able to choose the data types you want to recover from SD card or simply select "All File Types" on the interface. Click on the "Next" button to continue.

Step 3 Select Your SD Card And Scan
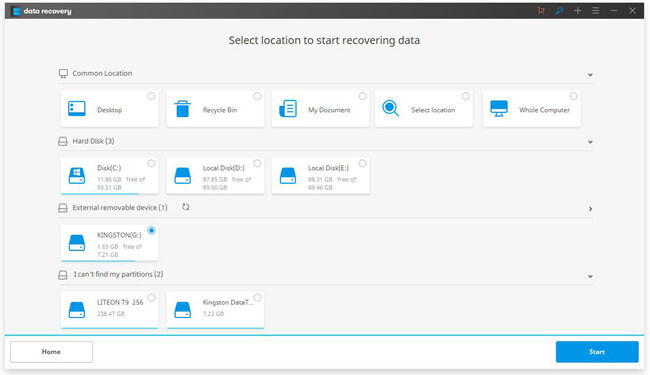
Select the SD card that is displayed on the program and click on the "Start" button. It will begin to scan your SD card with quick scan mode by default. If you fail to see the data you want, please use the "Deep Scan" mode to try again.

Step 4 Recover Corrupted SD Card Data
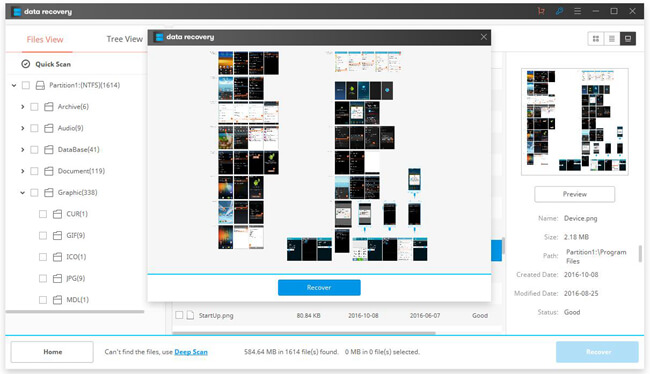
Wait patiently for the scanning process and you are allowed to preview the scanned out data. If you want to recover corrupted SD card data, please click on the "Recover" button on the interface.

The job is done! If you have any problem when following the above steps, please write down a comment on the below area!


