Android Data Recovery
Where are Pictures Stored on Android Phone?
-- Sunday, June 25, 2017
So when they try to expand Android memory storage by transferring pictures or other data to external SD card, some may have trouble in finding where the photos saved as the pictures taken by the camera, third-part camera apps or those transferred to SD card are stored in different folders. Go on reading the following article, you will figure out which folder on Android or SD card stores what kind of pictures.
- Solution: Where Are Pictures Stored on Android Phone?
- Tips: Easily Manage Photos on Android Smartphone
Solution: Where Are Pictures Stored on Android Phone?
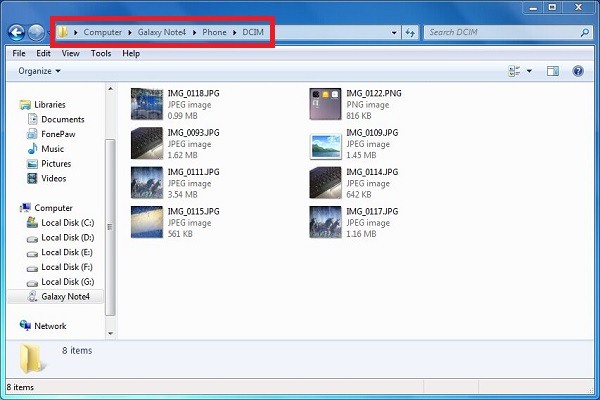
Pictures Taken with Pre-install Camera:By default, photos taken with pre-install camera will be stored in DCIM (Digital Camera Images) folder. It keeps pictures in this folder organized and prevent third-part camera app to import images that the camera didn't capture in it.

Screenshot or Photos Taken with Camera APP:
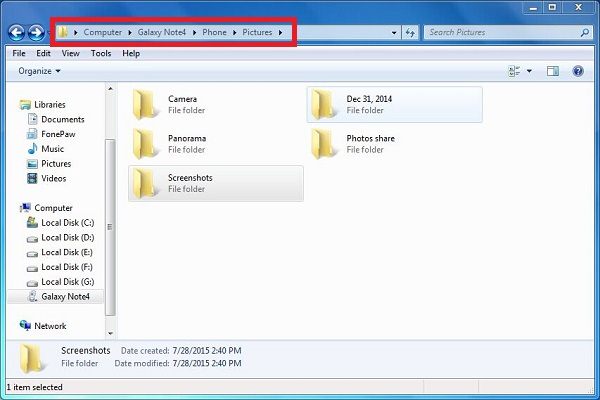
Images shot with 3rd-part camera app are automatically saved in a folder named after the app. As for the screenshot, you can access to Pictures/Screenshot and get them.

Tips: Easily Manage Photos on Android Smartphone
As most of the users may get tons of photos stored on mobile phone, it can be really chaotic and unmanageable sometimes. In this way, a good photo manager is a must. Now, I want to recommend a very effective tool- DoTrans; to manage your photos on Android, which allows you to back up files, add, delete and export data easily. Following the steps below to manage your Android photos.Step 1 Download and Install DoTrans on PC
Firstly, please download and install the DoTrans program on your computer by clicking the download button below. After you install it, just launch the program.


Step 2 Connect Android Phone to the Program
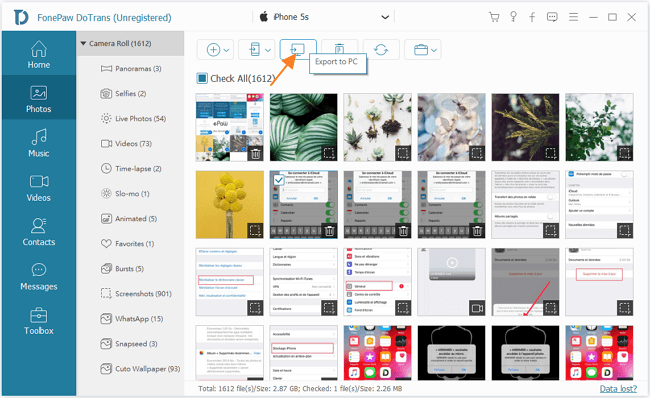
Plug your Android phone into the computer with a USB cable. Once it's connected and detected by the program, your Android data will show in the screen. To manage photos on your phone, simply click "Photos" in the left menu.
Step 3 Start to Manage Android Photos
If you want to export your photos to PC for more free space, you can tick the wanted photos and click "Export to PC" to save them to your computer. Before transferring, you can also preview the photos, simply right click and select "Preview". If you want to delete photos, choose the unwanted ones and click "Delete". To add photos from computer to your phone, click "Add File(s)" to select photos from your PC.

Read up here, you may know well where the photos stored on Android. If you want to know more about the file category in both internal and external storage, you can refer to the article Illustration on File Category of SD Card and get more details.


