Android Data Recovery
User Guide: How to Use Android Recovery (Mac)
-- Tuesday, March 12, 2013
Android Recovery (Mac) offers both Mac & Windows versions to help recover those deleted, formatted or lost photos, videos and audio files from your Android based phones such as Samsung Galaxy, HTC Android, Google Nexus, Motorola Atrix etc.
Below are the download buttons of Android Recovery both for Mac and Windows version.


When you are taking the Android Recovery (Mac) program to rescue deleted data, here is a step-by-step guide that should do some help.
Steps on Recovering Deleted Files from Android Phone/Tablet on Mac
Step 1 Stop Any Data Update after Data LostWhen you found that you have unintentionally deleted some data, keep away from your Android to prevent data got overwritten and as a result, Android files gone forever. To stop this from happening, you just need to stop adding or deleting contents on your Android.
Note: Please make sure that the battery is more than 20% to ensure a complete scan.
Step 2 Connect Android to Mac and Enable USB Debugging
Connect Android to Computer using USB cable.
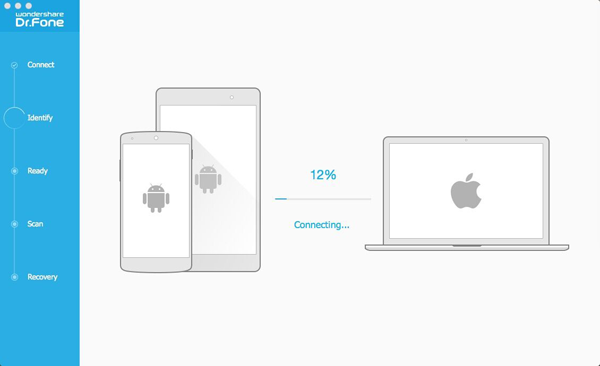
Within few seconds, your Android will be detected and you will be asked to enable the USB debugging. The process of different OS will be different:
1. For Android 4.2 or the later: Just try "Settings">"About Phone", tap "Build number" for several 7times until you get a note: "You are under developer mode". Then, go back to "Settings">"Developer options">"USB debugging".
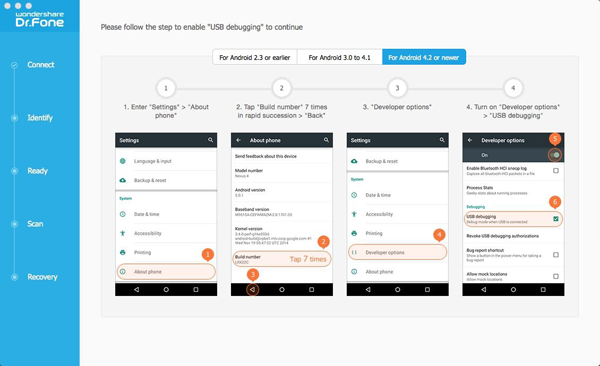
2. If it is Android 3.0 to 4.1: Find "Settings">"Developer Options">"USB debugging"

3. If you use Android 2.3 or earlier: click "Settings">"Applications">"Development">"USB debugging"
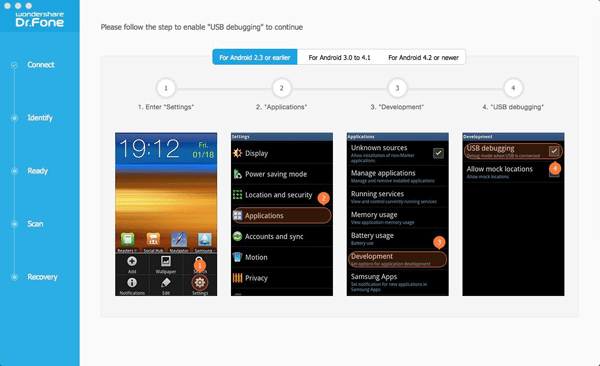
Note: This is just for those who haven't enabled USB debugging. If you've already turned it on, just skip this.
Step 3 Scan and Preview Android Data
Then, your Android will be detected and you are allowed to choose the data type to scan like this screenshot shows:
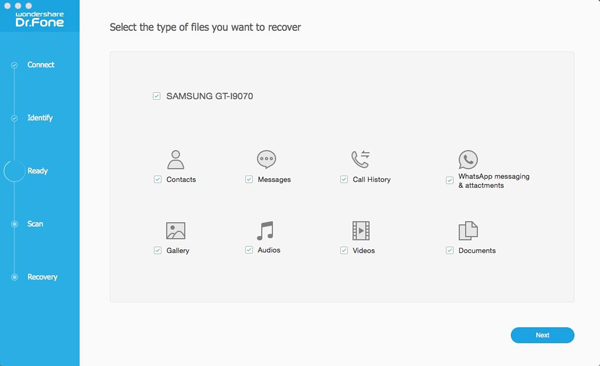
After that, you are allowed to choose the scan mode. Standard mode and advanced mode will be provided. Just click "Next" to move on.
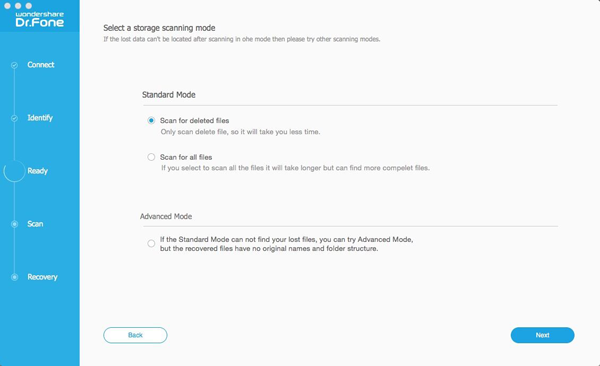
Then, you will be asked to allow the super user request. Just operate as what the below interface shows.

Step 4 Preview and Recover the Data on your Android
After that, all the data will be scanned out and listed in categories as below, take contacts for example. Preview the contact amount, name, company, job tile, phone and email shown.
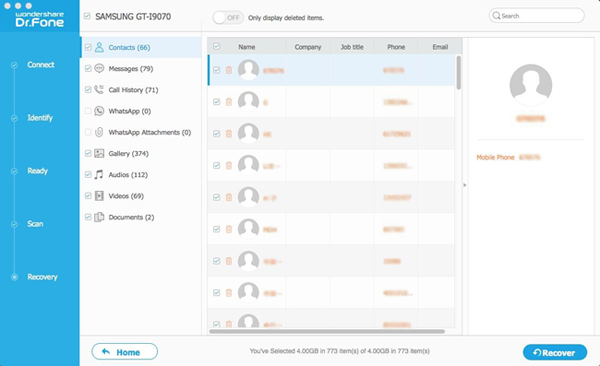
Choose the contacts you want by ticking the box next to the contact name.Then you can click the blue button "Recover" to restore them to your computer.
Note: The deleted data will be in orange and the existing data will be grey. You can only have the deleted files shown by clicking the "Only display deleted items" on the top of the interface. Lastly, you'd better form a habit of backing up Android regularly so that you can make sure that your backup is up to date. And once the data get lost, you can easily get restore them back.
That's it. You can try it on your own and contact us if you have any problem using Android Recovery (Mac).


